Showing posts with label tutorial. Show all posts

Bobby's World

Do you remember Bobby's World? It ran from 1990 to 1998 on FOX Kids. It was created by Howie Mandel (I didn't know that prior to looking this up!) It's based on the life of an energetic little 4 year old with a big imagination.


Tutorial?
I started with OPI...Eurso Euro, each subsequent step was created with acrylic paint.

More aboutBobby's World

Vintage Floral


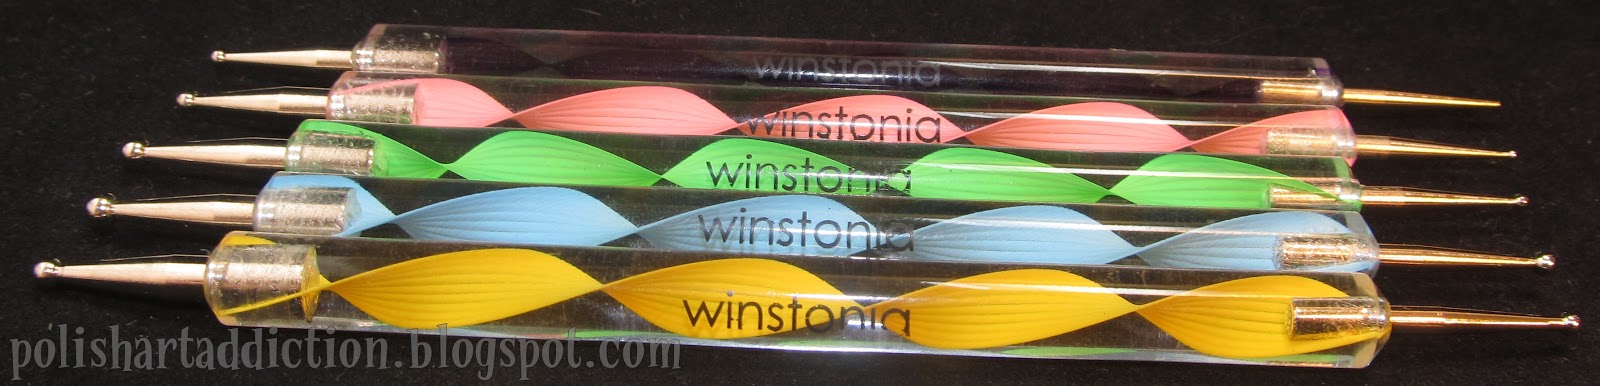
 I was inspired by this design from Aquaayame on Tumblr. Her flowers definitely look more like roses! I'm jealous. This look was created using the 8 piece nail art dotting tool & paintbrush set from Winstonia.
 The nail art set can be found here for $8.95. It's really a great kit for any new nail artist that needs a basic set of tools. Everything comes in the black satin zipper pouch. The kit includes five dual ended dotting tools, a variety of sizes. Also 3 detailing paint brushes of slightly different sizes. The kit also includes "one random color high quality nail file," as you can see, I got the light pink 100-180 grit.
(You can use the coupon code "POLISHARTADDICTION" at checkout to receive 10% off - valid until May 31, 2013)

The paintbrushes are a nice quality and weight to them. The website labels them as "sable detailing brushes" but I was informed by the company that this is not in reference to the actual hairs... but instead just the brown color. I was excited because I had heard that sable brush hairs made for the best paintbrushes.... but I think it's disappointing that they've labeled them in a misleading way.
 Another thing I was excited about was that it said the brush handles were acetone proof! That would be amazing because I'm constantly ruining my brushes by spilling acetone and it eats away at the paint..... One quick dip in my dappen dish of acetone with the back end of the brush....and the paint came right off.! Ugh! I guess they are just referring to the metal ferrule that holds the bristles?

The dotting tools are pretty standard, it's got a nice variety of sizes to cover all of your needs.

This again is the nail look I created all with these paint brushes and dotting tools.

I used a gazillion polishes for this design, I'll just list them.
Base of Zoya Farah. 
Wet N Wild Undercover & Haze of Love 
China Glaze Passion for Petals
Barielle Coco Bar & Lemondrops
OPI Jade is the New Black
& Sinful Colors Exotic Green


More aboutVintage Floral

Herbie The Love Bug Inspired

Anybody else love these movies as a kid? I loved watching the ones from the 60s, I wasn't as big a fan of the Lindsay Lohan versions.
These nails were inspired by his racing stripes and number.


Tutorial:
I used 3 coats of Lime Crime Milky Ways and then I topped it with a coat of Seche Vite to speed things along. I waited about 10 minutes before applying the striping tape. I started along the middle of my nail and applied one piece. Then a second piece touching along the side of the first piece. Place the next piece with enough spacing to accommodate another imaginary piece of tape between them. And repeat again with skipping another imaginary space.
Then I used a small nail art brush to apply Sally Hansen Insta Dri Rapid Red & Sinful Colors Rainstorm. 
Then I removed all of the strips of tape EXCEPT for the very first strip. That one I trimmed with some cuticle nippers to the edges of my nail. Top with Seche Vite topcoat.
 Voila!

More aboutHerbie The Love Bug Inspired

Disney's Up

One of the best movies put out by Disney in a long time. Love, love, love it!

I have an array of "balloons" on my ring finger nail. Just dots of acrylic paints and tiny white lines as the strings.

I started with a base of light blue polish and sponged on white clouds.


I painted Carl on my thumb. He's just so cute. I'm quite proud of him :)

Here is a breakdown of painting his face. Hopefully it helps you if you'd like to recreate him. 

More aboutDisney's Up

Mint & Coral Chevrons

Inspired by "Nail It!" Magazine, the new nail polish/nail art magazine for non-professionals! It's wonderfully entertaining to read. All of the latest ads from big brands showing off the new collections, interviews with skilled professionals, tips and tricks, nail art tutorials, and beautifully photographed nails! The magazine only costs $11.95 for the entire year! So subscribe now, it's a steal!

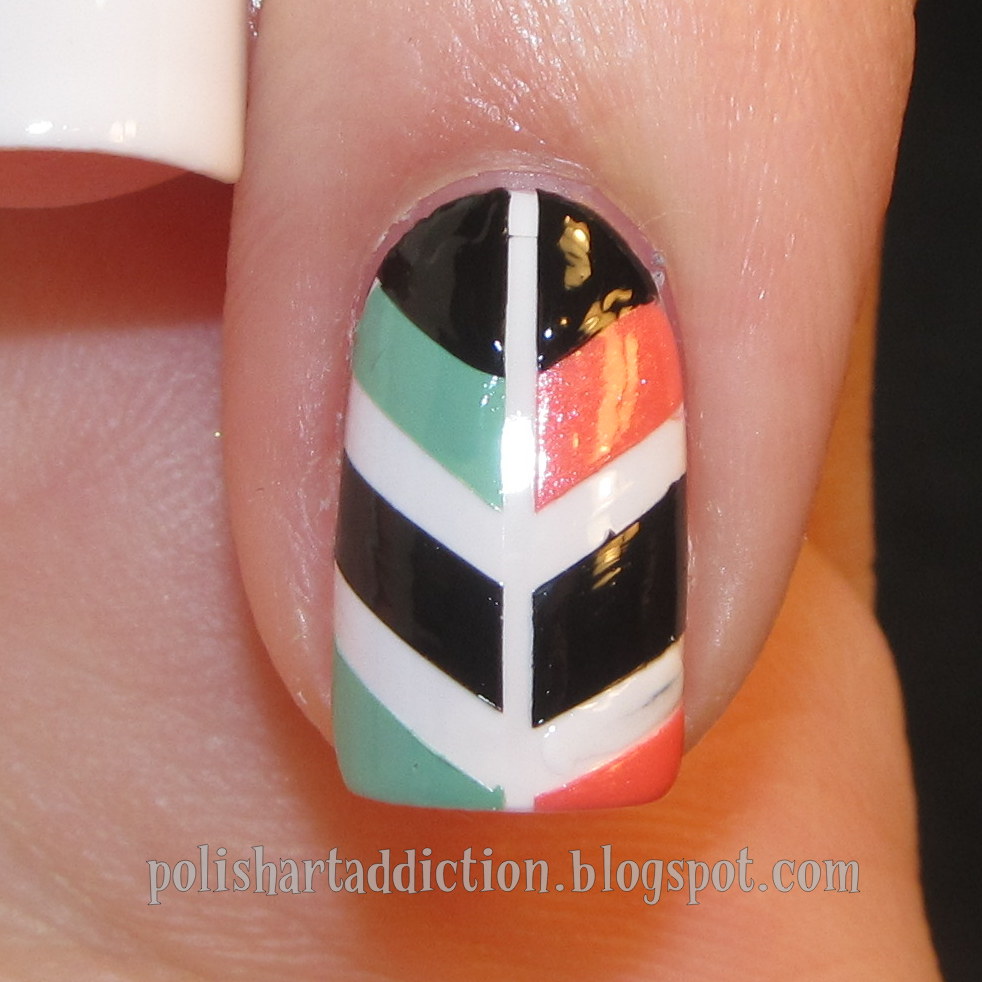
I immediately knew I wanted to recreate this look that was pictured on page 105 of the March premiere issue. The combination of mint and coral is very on trend, along with the chevrons.

I started out with the intentions of copying the entire design, but once I got into it.... I realized it was simply going to take toooooooooo long! So I broke it down and just painted the rest of my nails with a basic hint at the design.

 My thumb was white with a black triangle half moon.

Here is the pinky design, plus a picture by picture tutorial!

1. Paint your nails white and let it dry (I used Sally Hansen Lavender Cloud). Then apply the striping tape as shown. 
2. Fill in the negative spaces with the corresponding polishes: Sinful Colors black striper, Orly Ancient Jade, & China Glaze I Wanna Lei Ya.
3. Use your black striper to freehand the half moon triangle.
4. Remove the tape and top coat!

Here is the index finger design.

1. Paint your nails white and let it dry (I used Sally Hansen Lavender Cloud). Then apply the striping tape as shown. 
2. Apply the mint and coral polishes. Orly Ancient Jade & China Glaze I Wanna Lei Ya.
3. Apply the black striper polish, just freehand the half moon area.
4. Remove the tape and topcoat!

So pretty!

More aboutMint & Coral Chevrons

Disney Cars - Mater

I couldn't do the movie Cars without featuring Mater! He's my favorite character from the movie!
I really like the plain nails that mimic the rusty antique metal.


Here's how I did it.

Paint nails with 2 coats of Essie Very Structured

Randomly sponge on Barielle Coco Bar, Zoya Dea, Essie Penny Talk, & Barielle Sweet Addiction.

Begin the outline for his eyes and mouth with black acrylic paint.

White acrylic paint.

I used a shimmery green matte polish for his eyes iris'. Then defined his back teeth with gray acrylic paint.

Add black pupils and a white shine spot, then topcoat the whole thing with Seche Vite.


More aboutDisney Cars - Mater

Disney Cars - Lightning McQueen

More Disney!
(Cars was requested by Rachel Dodge through my suggestion box at the bottom of my page.) 


 The gradient/fade on the numbers was a little tricky, but it came out great!

Tutorial?
I started with Sally Hansen Insta Dri Rapid Red

Black acrylic paint here

White and yellow acrylic paint. I added more Rapid Red to the "hubcaps".
 

Various acrylic paints and Sinful Colors Rainstorm for his blue eyes.
 

Two coats of Seche Vite topcoat to even everything out!

More aboutDisney Cars - Lightning McQueen

Disney Dumbo French Tips

Disney's Dumbo! Who can say they didn't love that cute baby elephant? I want to get back into doing more cartoon manicures, so I'm easing back in. These are inspired by his little neck ruffle collar. Then I perched his little hat on my thumb.


Here is the step by step of how to do the ruffle nails. I used China Glaze Recycle, Sally Hansen Insta Dri Rapid Red, and Sinful Colors striper in black. The yellow is acrylic paint.

More aboutDisney Dumbo French Tips