Showing posts with label brown. Show all posts

Essie - Master Plan

Essie Master Plan
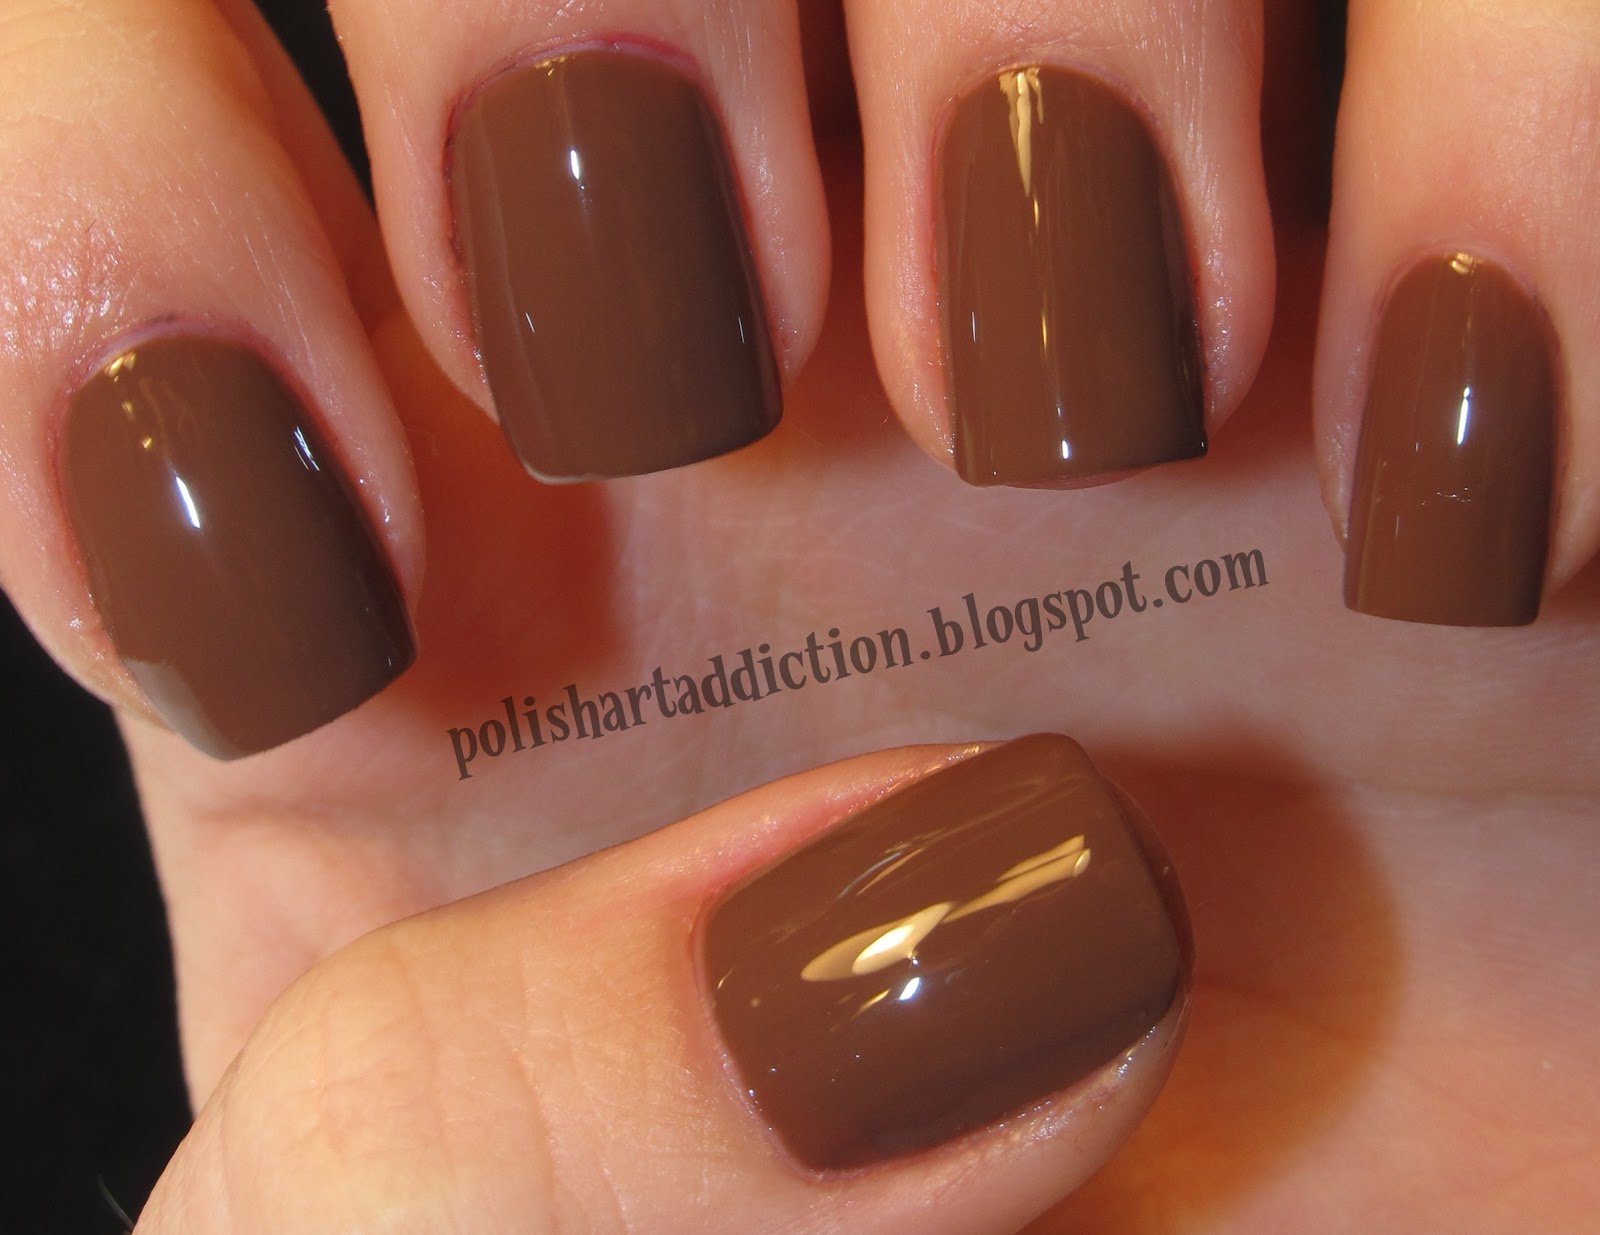
My mom knows how to spoil me. She picks up random polishes that she gets for a good price. Some are great finds, others are fails. She managed to get this Essie for $0.30! A discount grocery store near our home buys overstock items from pharmacies and this is what happens!

Pictured is 2 coats. A light putty/taupe creme.


More aboutEssie - Master Plan

Precision Oasis Collection

Hi guys! Today I'm bringing you a new brand to the blog! Not necessarily a new brand (they've been in business for 30 years) but they are new to ME, as I have never had access to this brand before.

They have sent me their Oasis Collection in order to review, so here we go. Overall it's quite subdued and hints at fall or autumn in my opinion. In general, I find their bottle design to be appealing and the brush is of standard quality making it easy to get an even application.

Free of Toluene, Formaldehyde, & DBP

The Oasis Collection can be purchased for $5.95 each.

Sandstorm
4 thin coats pictured. A pale beige with yellow undertones. I feel like this is one that can be worn when you need a quiet palate cleanser. Fewer than 4 coats however was slightly streaky. I would recommend allowing for a minute of dry time between coats, this seems to help combat streaks.


Sahara Deserted Me
3 coats pictured. A warm nude with pink undertones. Creme finish.


Been There Dune That
3 coats pictured. Nude/ light taupe color with brown undertones. Creme finish.


Comparing these three side by side,  you can see the difference in the undertones. It seems like it could offer a perfect nude for any skin tone.


Sage
2 coats pictured. Light and muted army green. It also has silver shimmer. No problems with application here. I love this color for the fall.


   You're in De-Nile River
3 coats. It reminds me of chocolate. :)
This one immediately reminded me of OPI You Don't Know Jacques, so a comparison is below.


Comparison with Wet N Wild Wet Cement & You Don't Know Jacques


Scorpion King
2 coats pictured. Perfectly easy application. Charcoal/black with loads of shimmer.


What do you think? Do you have any Precision Lacquers in your stash?

More aboutPrecision Oasis Collection

Flower - Go With The Flow-er & Cosmos-politan

"FLOWER Nail Lacquer - From the new cosmetics range by Drew Barrymore, the Nail Lacquer is ultra-shiny, long-lasting and non-chipping. The colors are vibrant and on trend, and 3-FREE 
(free of DBP, toluene and camphor).
Shades: Go With The Flow-er, That’s Just Dan-De-Lion, Fanatical Botanical, Gorgeous Gerbera, May Flowers, I Lavendare You!, Thistle or That?, Good Bud-dy, Eye of the Tiger Lily, What’s the Daffodily-O?, Cosmos-politan, Precious Poppy, First Bloom, Budding Romance, Venus Fly Trap, April Showers. 
Price: $4.98, Available at Walmart and Walmart.com"


Go With The Flow-er is a nude/putty/khaki shade. Pictured is 2 coats. Creme finish. Formula is fantastic! I was not expecting such great results, but it applied easily and leveled out without any difficulty. It was also very shiny on it's own.


Cosmos-politan is a medium pink with slight coral undertones. Slight shimmer visible. Also great experience with a wonderful formula. These polishes are definitely worth $4.98. That's such a great price, it's hard to pass up. I will be sure to take a closer look at what other shades are available.


 *These products were provided for review*
More aboutFlower - Go With The Flow-er & Cosmos-politan

Disney Cars - Mater

I couldn't do the movie Cars without featuring Mater! He's my favorite character from the movie!
I really like the plain nails that mimic the rusty antique metal.


Here's how I did it.

Paint nails with 2 coats of Essie Very Structured

Randomly sponge on Barielle Coco Bar, Zoya Dea, Essie Penny Talk, & Barielle Sweet Addiction.

Begin the outline for his eyes and mouth with black acrylic paint.

White acrylic paint.

I used a shimmery green matte polish for his eyes iris'. Then defined his back teeth with gray acrylic paint.

Add black pupils and a white shine spot, then topcoat the whole thing with Seche Vite.


More aboutDisney Cars - Mater

Basketball Nails

I get a lot of different requests for nail art, and frequently sports or cheerleading has been suggested by my school age followers. So here is a basketball design. I was greatly inspired by The Daily Nail. I remember when she first posted them in 2011 and I thought it was brilliant. To leave the dots without topcoating them. It saves the texture! 
And of course a hoop & net for the accent nail.

Step by step:

Base coat only on the accent nail. 2 coats of Essie Very Structured for the others.
Apply dots of Very Structured mixed with some brown polish.
I used half of a hole reinforcement sticker to mask off my half moon and then stamped the rest with BM-209 & Konad Special White Polish.
Then remove the sticker and apply Sally Hansen Celeb City to the dividing line. Use a black nail art striper to apply the basketball lines.

More aboutBasketball Nails

Incoco Wear Test - Application

Hi guys! So I'm preparing to leave for my trip to Los Angeles! I'll be gone for about 5 days, but don't worry I have plenty of posts scheduled in the meantime. I thought a vacation would be a great opportunity to test run some Incoco Nail Polish Strips. I found these at a mall kiosk in Dallas TX. I took the opportunity to give the girl my blog business card ;) And she offered to sample a nail strip as an accent nail on top of my existing manicure. I then purchased a set to review for here! It cost $18 for the design I got. Now that I look at where they are on the website and cost only $9.99.... I feel robbed. Lol.

This design is called Gilded Couture, and it's part of the new fall collection called Cobra Couture.

It comes in 2 seperate packs. The french tip design strips and the clear strips.

 Each different sized strips looks like this with 2 french tips per size.

Maybe you can see the seam better here now that I've removed one.

You start with clean naked nails. The strips apply a lot like Sally Hansen Salon Effects Strips. Just peel off the backing and line it up where you want it. Smooth any wrinkles and file off the excess. My nails recently got trimmed to nubs after moving heavy luggage for my Dallas trip... So I placed the strips a little lower than my natural smile line.

It's a really nice fall appropriate design. And neutral enough to go with several of my L.A. outfits.

This is how many strips I had left after finishing both hands. Side note - I have large nail beds and normally my thumbs are too wide for standard strip sizing, and I usually can't wear the smallest size because it's only half the size of my pinky. These Incoco strips worked great for me though, biggest size was perfect for my thumbs and no wasted tiny baby strips. :) These extras can be sealed in an airtight bag and kept for later use if you like.

Then the clear strip layer.

 You get 16 total clear strips

My first thought was that they would be slightly pink toned to enhance the french aspect, but no they are perfectly clear. Almost like putting saran wrap on your nails.

It adds a nice shiny glow, just like topcoat. These strips are made so that you don't have to apply any base coat or topcoat. They are made of nail polish so they remove with acetone.


Sizing on the clear strips was perfect for me as well. Just 6 strips left over at the end.

In comparison to the Sally Hansen Strips, I found Incoco to be much thinner and slightly easier to apply. The SH strips being thicker makes it easier to pull it back up and reposition if necessary, Incoco I'm afraid would probably tear.

So I plan on wearing these for a while and giving them a wear test. I'll be sure to post an updated final verdict.
More aboutIncoco Wear Test - Application