Showing posts with label acrylic paint. Show all posts

Braceface Nail Art

This was a great suggestion from LittleMonsterx14. I remembered this cartoon once she suggested it! I really enjoyed it growing up. 
Some info from wikipedia:
 "Braceface is a Canadian animated series that aired on Teletoon in Canada, and on Disney Channel and ABC Family in the United States, as well as Pop Girl in Australia. It is produced by American actress Alicia Silverstone. Sharon Spitz is the main character of the series. Like most girls, Sharon sometimes does get into trouble and messes up like every other teen, but she always learns from her mistakes and sets things right in the end, no matter what the situation. Sharon is also known to be a clumsy girl and, would usually end up embarrassing herself somehow."

My poor planning lead to her face not fitting entirely on my nail. I wanted to include her cute smile since her braces were the whole point behind the title. So I just made braces run across the tips of my other nails. The blue is China Glaze Bahamian Blue and the rest are acrylic paints.

 Her face came out a little jaundiced looking because the yellow paint doesn't agree with anything being put on top of it. So the yellow from her hair bled through the beige face color by the time I took my pictures.


More aboutBraceface Nail Art

Tale Spin

Were you a fan of Tale Spin? The series with characters adapted from "The Jungle Book," I chose to focus on the logo and Baloo.

 Base polish is Essie Navigate Her, all the rest of the details were done with acrylic paints.

More aboutTale Spin

The One That Copied Lexi From FingerPainted

Sometimes something comes along that just really intrigues you.... This has been the case for me and Lexi's baby stiletto nail shape. I just adore them. I think it looks so cute on her, and besides I LOVE pretty much all the nail art she has ever done. The girl has some mad skills. ;) 

My nails were getting too long and to the point where I wanted to give them a big chop.... So it struck me to do an experiment. I wondered if my nails could do a baby stiletto too? Lexi mentioned once that she does a thin layer of gel polish over hers to reinforce them and help prevent breaking the tips. I thought that mine cut to this shape without gel might just last a day or two, but enough to tribute some nail art to one I admire. Surprisingly, as I type this, I'm 4 days in and several polish changes later, still with intact tips! I guess it's the Duri Rejuvacote I have to thank for that. The stuff makes my nails rock solid.
 I copied this simple bow nail art she did because I had the same base polish, Shimmer Alessandra. Acrylic paints for the bow.

 First impression: I'm not too fond of this nail shape on myself. I think it's more flattering on Lexi's nail bed shape. HOWEVER, I've vowed to give it a good run and not just rush to that decision. I'm going to leave them this shape for at least a week or two to really feel it out. Wish me luck!
More aboutThe One That Copied Lexi From FingerPainted

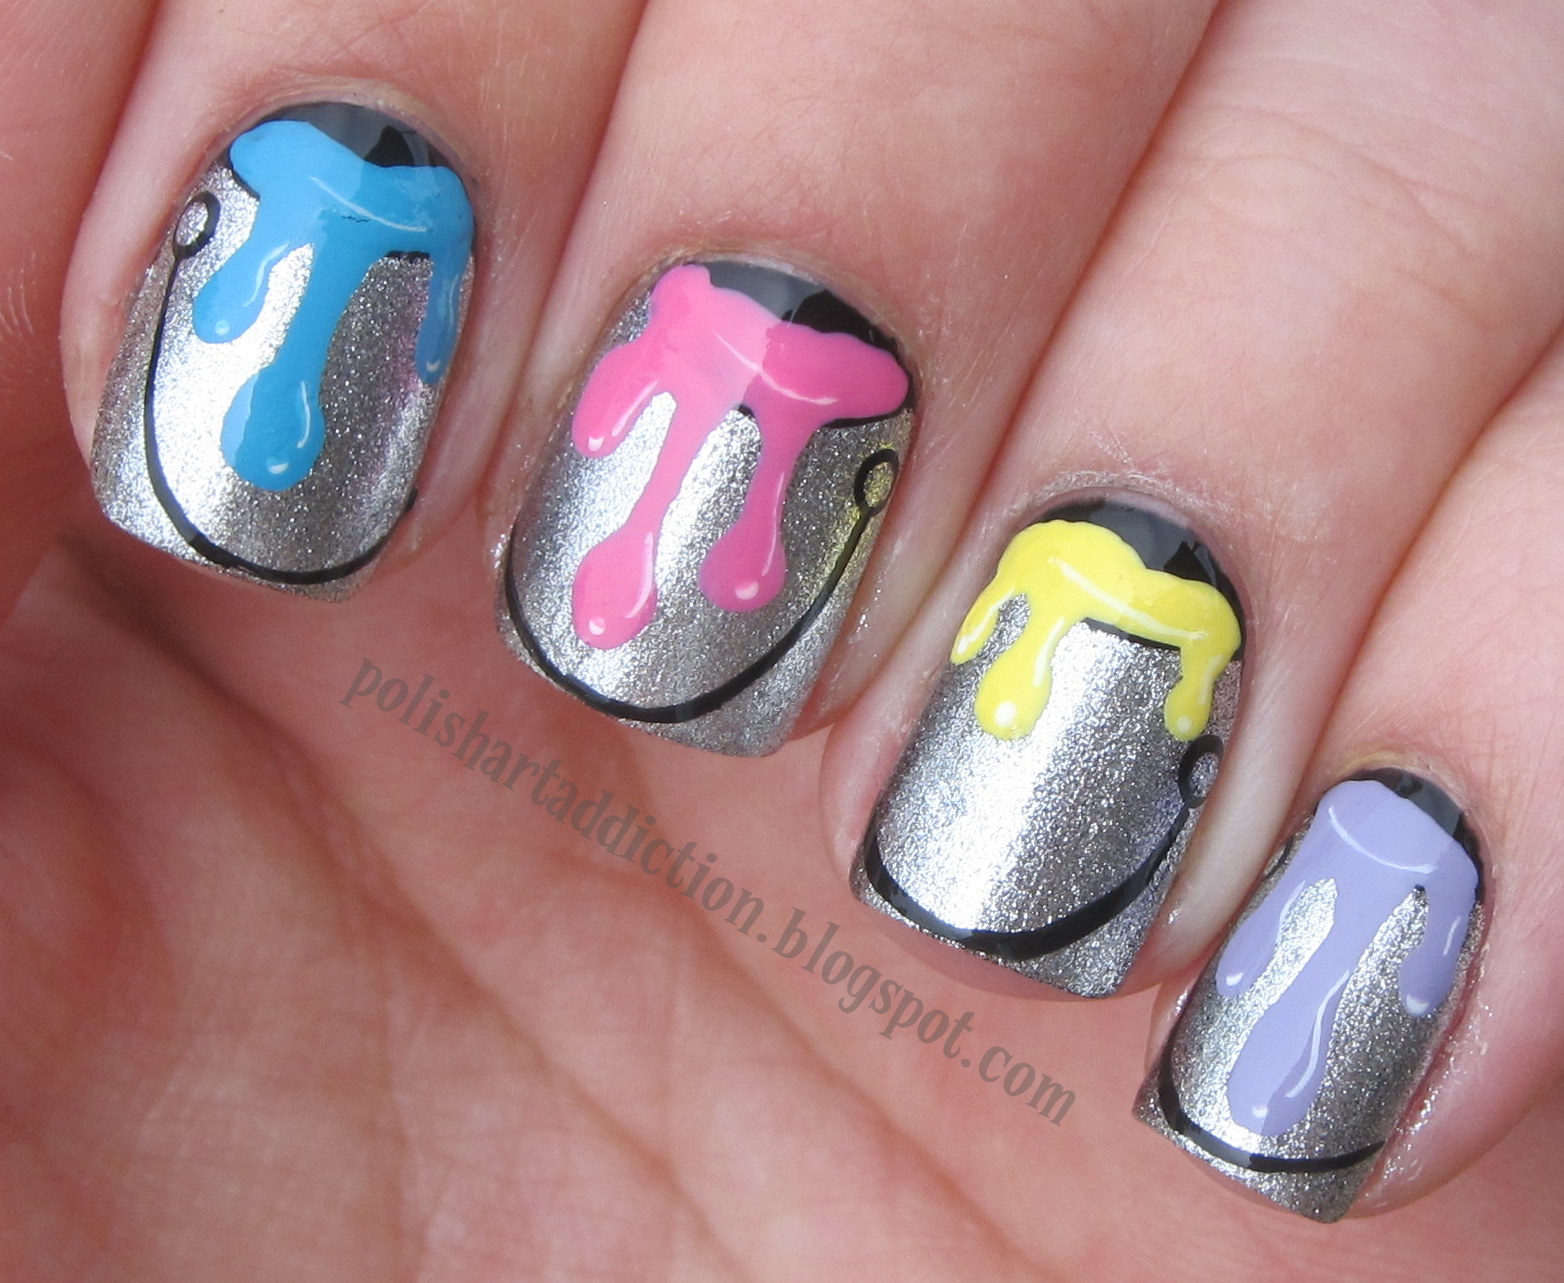
Drippy Paint Cans

Finally a nail art inspired by something in my own brain! Of course what do I know? This has probably been done before, but the idea hit me so here we go.

Half moons of black, silver nails. Then some freehanded acrylic paint for the sloshy paint drippings. Small white shine highlight. Then black and silver stacked dots off to the side, then a swoop of the paint can's handle. Topcoat to finish.


Sinful Colors Black on Black & Sally Hansen Celeb City, the rest are acrylic paints
More aboutDrippy Paint Cans

Stripes & Drips

These nails were inspired by Nancy Mc and her Mickey nail wheel.
I don't think I've ever done drippy nails before, but these were a lot of fun.
 I used Sinful Colors Snow Me White as a base and started taping off the stripes to create them. After 2 nails I got sick of that slow process, so I just freehanded them with Sinful Colors Time Out which is a black striper brush polish.
 I then applied white for the drippy sections because I wanted the neon to be vibrant. The neon dark pink is Color Club Raspberry Rush. Then black striper polish to outline the drips and a white acrylic paint and a tiny brush for the shine marks.


More aboutStripes & Drips

Disney's Up

One of the best movies put out by Disney in a long time. Love, love, love it!

I have an array of "balloons" on my ring finger nail. Just dots of acrylic paints and tiny white lines as the strings.

I started with a base of light blue polish and sponged on white clouds.


I painted Carl on my thumb. He's just so cute. I'm quite proud of him :)

Here is a breakdown of painting his face. Hopefully it helps you if you'd like to recreate him. 

More aboutDisney's Up

Disney Cars - Mater

I couldn't do the movie Cars without featuring Mater! He's my favorite character from the movie!
I really like the plain nails that mimic the rusty antique metal.


Here's how I did it.

Paint nails with 2 coats of Essie Very Structured

Randomly sponge on Barielle Coco Bar, Zoya Dea, Essie Penny Talk, & Barielle Sweet Addiction.

Begin the outline for his eyes and mouth with black acrylic paint.

White acrylic paint.

I used a shimmery green matte polish for his eyes iris'. Then defined his back teeth with gray acrylic paint.

Add black pupils and a white shine spot, then topcoat the whole thing with Seche Vite.


More aboutDisney Cars - Mater

Disney Cars - Lightning McQueen

More Disney!
(Cars was requested by Rachel Dodge through my suggestion box at the bottom of my page.) 


 The gradient/fade on the numbers was a little tricky, but it came out great!

Tutorial?
I started with Sally Hansen Insta Dri Rapid Red

Black acrylic paint here

White and yellow acrylic paint. I added more Rapid Red to the "hubcaps".
 

Various acrylic paints and Sinful Colors Rainstorm for his blue eyes.
 

Two coats of Seche Vite topcoat to even everything out!

More aboutDisney Cars - Lightning McQueen

Disney Lilo & Stitch Nail Art

Getting back into the cartoon nail art swing of things! Lilo and Stitch is a perfect excuse to use various hibiscus nail art stamps too....
I used the Wet N Wild Saved By The Bell themed collection as my base polishes. I used 3 or 4 different image plates for all of the different flowers and leaves. I wrote "Ohana" in cursive on my ring finger nail, because hopefully you remember: "Ohana means family, family means nobody gets left behind. Or forgotten." 
A freehand Stitch on my thumb nail. I started taking tutorial pictures, but ended up accidentally skipping too many steps, so it didn't make sense... :(

 OMG he's just so cute!


More aboutDisney Lilo & Stitch Nail Art

Disney Dumbo French Tips

Disney's Dumbo! Who can say they didn't love that cute baby elephant? I want to get back into doing more cartoon manicures, so I'm easing back in. These are inspired by his little neck ruffle collar. Then I perched his little hat on my thumb.


Here is the step by step of how to do the ruffle nails. I used China Glaze Recycle, Sally Hansen Insta Dri Rapid Red, and Sinful Colors striper in black. The yellow is acrylic paint.

More aboutDisney Dumbo French Tips

Pshiiit Inspired Ikat Pattern

I've never tried the "Ikat" pattern for nail art, but these from Pshiiit really stood out and I just had to. 
The polishes I used were China Glaze For Audrey & Sinful Colors 24/7. The black and white were both acrylic paint.


 Click to enlarge for a step by step if you're looking to recreate them for yourself.

More aboutPshiiit Inspired Ikat Pattern