Showing posts with label sally hansen. Show all posts

Floral Skittles

I wanted to do another floral design, but this time I mixed it up with a skittle variation. 
 
I used a lot of different polishes:
Sally Hansen Complete Salon Manicure Cafe Au Lait
Lime Crime Milky Ways
Orly Gumdrop
Rimmel I Lilac You
China Glaze Spontaneous & Sunday Funday

More aboutFloral Skittles

Herbie The Love Bug Inspired

Anybody else love these movies as a kid? I loved watching the ones from the 60s, I wasn't as big a fan of the Lindsay Lohan versions.
These nails were inspired by his racing stripes and number.


Tutorial:
I used 3 coats of Lime Crime Milky Ways and then I topped it with a coat of Seche Vite to speed things along. I waited about 10 minutes before applying the striping tape. I started along the middle of my nail and applied one piece. Then a second piece touching along the side of the first piece. Place the next piece with enough spacing to accommodate another imaginary piece of tape between them. And repeat again with skipping another imaginary space.
Then I used a small nail art brush to apply Sally Hansen Insta Dri Rapid Red & Sinful Colors Rainstorm. 
Then I removed all of the strips of tape EXCEPT for the very first strip. That one I trimmed with some cuticle nippers to the edges of my nail. Top with Seche Vite topcoat.
 Voila!

More aboutHerbie The Love Bug Inspired

Lotsa Hearts

These ended up looking like generic stickers, but I swear I painstakingly applied each and every heart. I used a dotting tool and a tiny nail art brush. They were inspired by Rebecca's nails here.


The polishes I used:
Base of Sinful Colors Snow Me White
China Glaze Laced Up & Electric Beat
Sally Hansen Insta Dri Heat Flash & Lightening
Orly Fresh

More aboutLotsa Hearts

Mint & Coral Chevrons

Inspired by "Nail It!" Magazine, the new nail polish/nail art magazine for non-professionals! It's wonderfully entertaining to read. All of the latest ads from big brands showing off the new collections, interviews with skilled professionals, tips and tricks, nail art tutorials, and beautifully photographed nails! The magazine only costs $11.95 for the entire year! So subscribe now, it's a steal!

I immediately knew I wanted to recreate this look that was pictured on page 105 of the March premiere issue. The combination of mint and coral is very on trend, along with the chevrons.

I started out with the intentions of copying the entire design, but once I got into it.... I realized it was simply going to take toooooooooo long! So I broke it down and just painted the rest of my nails with a basic hint at the design.

 My thumb was white with a black triangle half moon.

Here is the pinky design, plus a picture by picture tutorial!

1. Paint your nails white and let it dry (I used Sally Hansen Lavender Cloud). Then apply the striping tape as shown. 
2. Fill in the negative spaces with the corresponding polishes: Sinful Colors black striper, Orly Ancient Jade, & China Glaze I Wanna Lei Ya.
3. Use your black striper to freehand the half moon triangle.
4. Remove the tape and top coat!

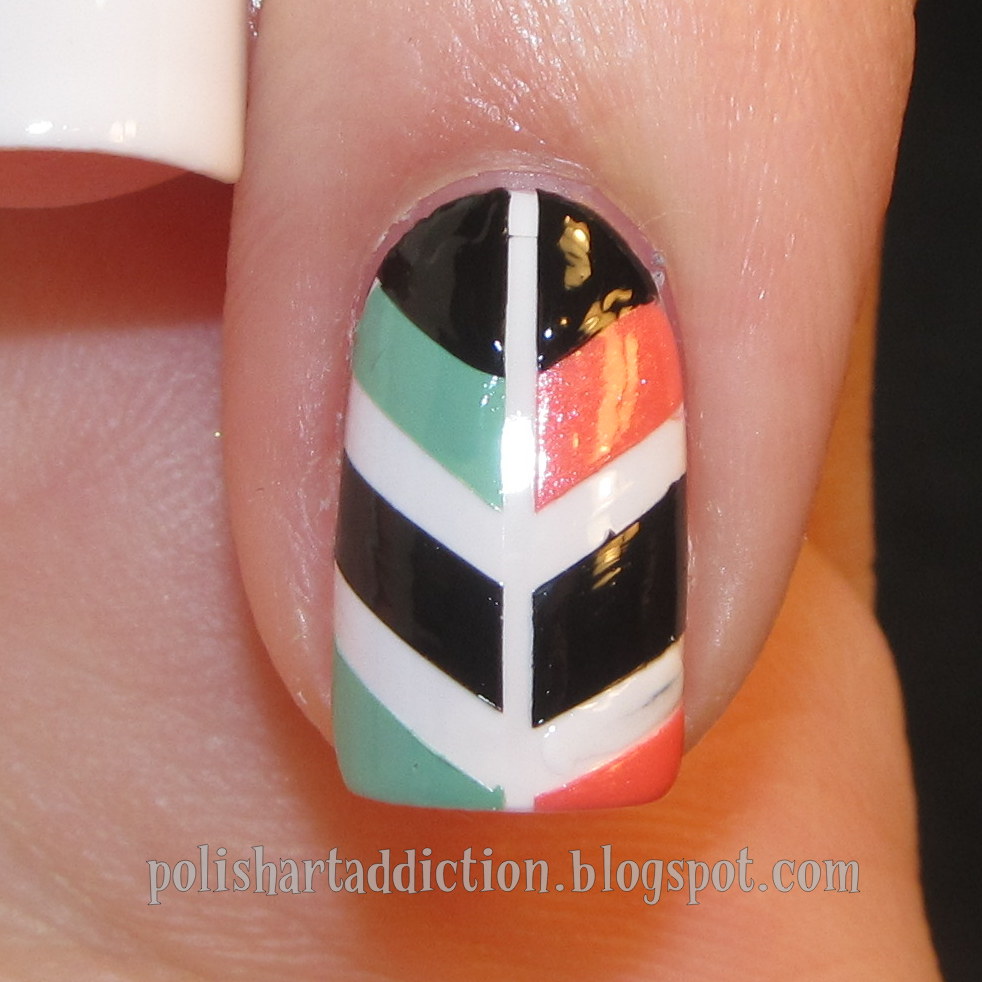
Here is the index finger design.

1. Paint your nails white and let it dry (I used Sally Hansen Lavender Cloud). Then apply the striping tape as shown. 
2. Apply the mint and coral polishes. Orly Ancient Jade & China Glaze I Wanna Lei Ya.
3. Apply the black striper polish, just freehand the half moon area.
4. Remove the tape and topcoat!

So pretty!

More aboutMint & Coral Chevrons

Quick French

Here is a pretty simple french tip design I did, and quickly regretted. The rhinestones drove me nuts. 
 A regular white french tip (I used Sally Hansen Lavender Cloud), you can freehand or tape them off, whichever you prefer. Then I used a skinny striper brush to line the smile line with Sally Hansen Rapid Red. Then secured a red rhinestone when I applied topcoat.


More aboutQuick French

Disney Cars - Lightning McQueen

More Disney!
(Cars was requested by Rachel Dodge through my suggestion box at the bottom of my page.) 


 The gradient/fade on the numbers was a little tricky, but it came out great!

Tutorial?
I started with Sally Hansen Insta Dri Rapid Red

Black acrylic paint here

White and yellow acrylic paint. I added more Rapid Red to the "hubcaps".
 

Various acrylic paints and Sinful Colors Rainstorm for his blue eyes.
 

Two coats of Seche Vite topcoat to even everything out!

More aboutDisney Cars - Lightning McQueen

Baseball Nails

Here was my second attempt at sports themed nails. I'm not as thrilled with them, but figured some of you might like them anyway.
 I painted my nails with Sinful Colors Snow Me White, then freehanded the stitching with Sally Hansen Rapid Red & a skinny striper brush.

 Here it is step by step:

More aboutBaseball Nails

Sally Hansen Xtreme Wear - Breezy Blue

I'm a sucker for any blue polish and I found this beauty on a new SH display at Walgreens. Too bad the formula sucks...... :(

Pictured is 3 coats and it went on streaky. Then it took a ridiculous amount of time for it to dry. Even applying Seche Vite, my nails were still dent-able an hour later.

It's got a nice subtle shimmer to it and it reminds me of Hard Candy Sky, but I have similar formula issues with that polish.


More aboutSally Hansen Xtreme Wear - Breezy Blue

Polished Perfectionist Flamingo Inspired

These nails were another pinterest find. Inspired by these from The Polished Perfectionist.
I didn't have the exact same polishes, I used Sinful Colors Beautiful Girl for the light coral and a franken for the darker. Then the image is the same from BM214 & Konad Special White Polish. My highlight polish along the feathers was Sally Hansen HD Byte.


Just a sponged gradient but it looks awesome!
More aboutPolished Perfectionist Flamingo Inspired

Sponge and Stamp

These nails were directly inspired by Lachesis and Co. I used a slightly different teal polish because I don't have Turned Up Turquoise in my stash. I used Sinful Colors Savage.


Here is a photo progression of how I did these. 
Started with a base of Sally Hansen Complete Salon Manicure Lavender Cloud.
Sideways sponge gradient with SH LC and Sinful Colors Savage.
Stamp with BM12 and Konad Special Black polish.
Finish with Seche Vite topcoat.

More aboutSponge and Stamp

Snowy Special Request

These were a special request from one of my coworkers. She had been scrolling around on Pinterest and fell in love with these snowman nails from The Nailasaurus. She asked me to paint them on my nails for the next time we worked together. I was happy to oblige because they're adorable. :)

I had to photoshop collage these 2 to get it perfectly lined up. I'm simply not that flexible.


The base polish is Sally Hansen Insta Dri Co-Bolt Blue. It's so vivid and stunning! This mani reminded me that I love that polish!
More aboutSnowy Special Request