Showing posts with label tape. Show all posts

Chevrons With Craft Scissors

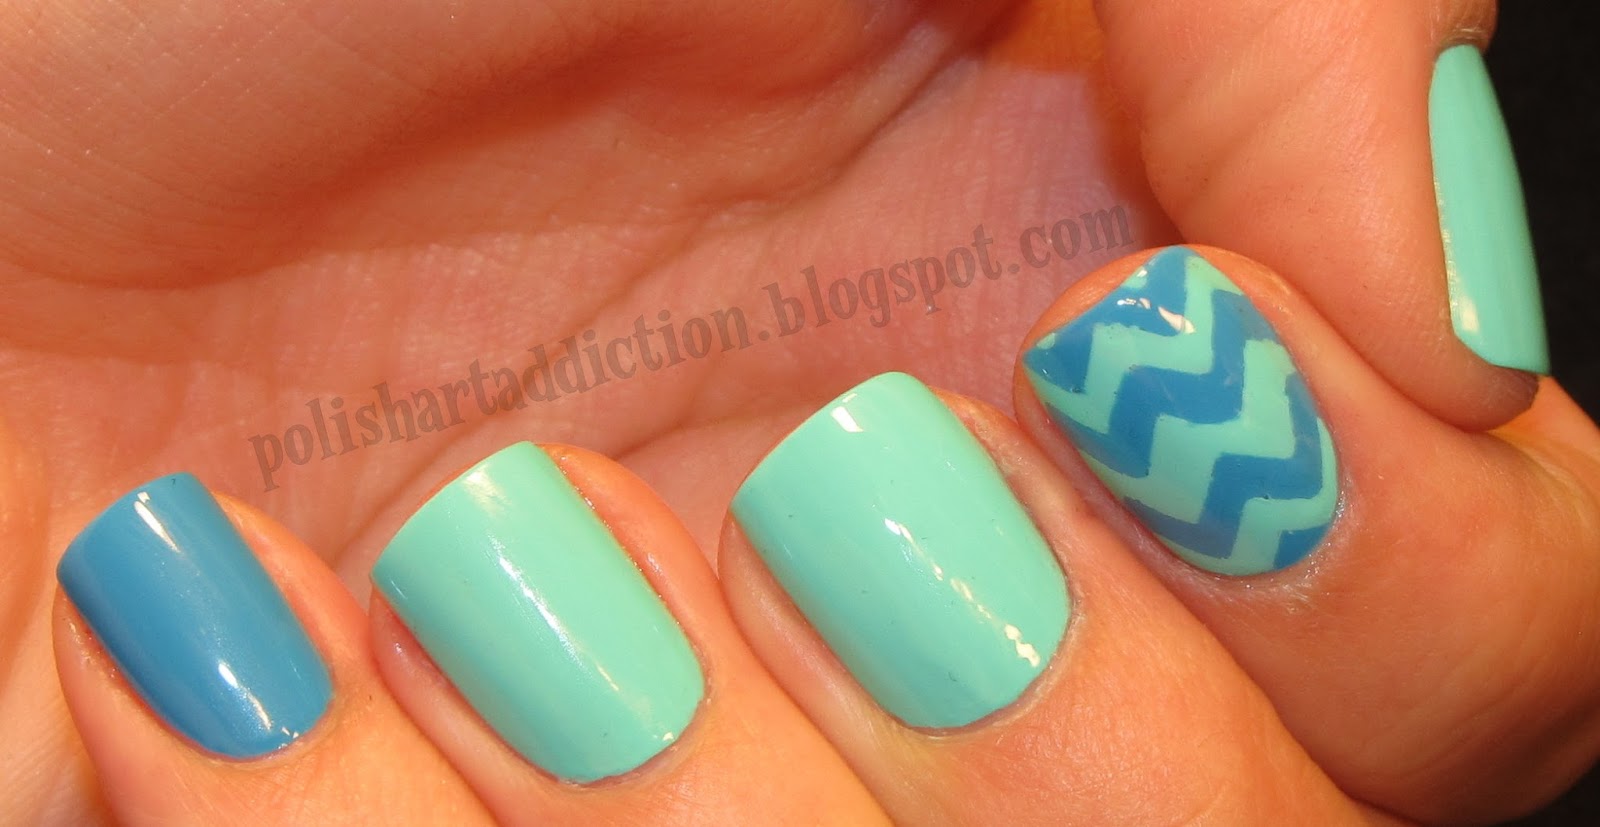
These colors compliment each other so well! China Glaze Too Yacht To Handle & Sunday Funday! I did a simple mixed up look with two accent nails of chevron pattern. For the chevron nails I just cut some strips of scotch tape with those zigzag crafting scissors to mask off the chevrons.


 These got a lot of attention at work!
More aboutChevrons With Craft Scissors

Mosaics

I wanted to experiment with a random pattern of striping tape to get a mosaic look. I felt like these colors made for a unique combination.

I used Sinful Colors Snow Me White (let it dry THOROUGHLY) then masked off the geometric shapes with striping tape. I then filled in each section with polish and removed the tape before it had a chance to dry much. 

The polishes I used were: 
  • China Glaze Lemon Fizz
  • Orly Ancient Jade
  • Sinful Colors Rainstorm
  • China Glaze Passion For Petals
  • China Glaze Sea Spray


More aboutMosaics

Mint & Coral Combo

I can't seem to get tired of mint and coral as a color combo. For this look I threw in some lilac and black for a funky striped skittle mix.
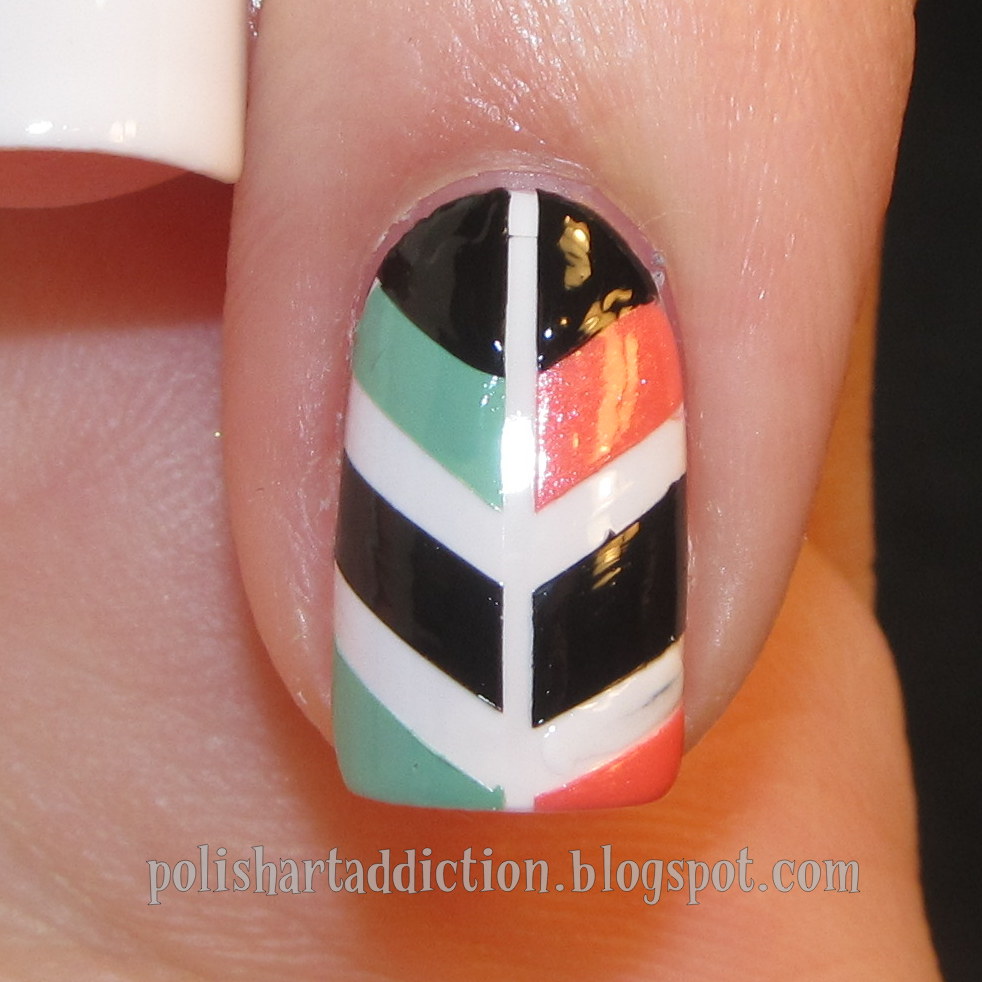
I used China Glaze For Audrey, Rimmel I Lilac You, & the coral is a franken I made up. For the accent nail I used a base of white polish and then striping tape to mask off the stripes of varying widths. The black polish was just my Sinful Colors black striper polish.


More aboutMint & Coral Combo

Stripes & Drips

These nails were inspired by Nancy Mc and her Mickey nail wheel.
I don't think I've ever done drippy nails before, but these were a lot of fun.
 I used Sinful Colors Snow Me White as a base and started taping off the stripes to create them. After 2 nails I got sick of that slow process, so I just freehanded them with Sinful Colors Time Out which is a black striper brush polish.
 I then applied white for the drippy sections because I wanted the neon to be vibrant. The neon dark pink is Color Club Raspberry Rush. Then black striper polish to outline the drips and a white acrylic paint and a tiny brush for the shine marks.


More aboutStripes & Drips

Mint & Coral Chevrons

Inspired by "Nail It!" Magazine, the new nail polish/nail art magazine for non-professionals! It's wonderfully entertaining to read. All of the latest ads from big brands showing off the new collections, interviews with skilled professionals, tips and tricks, nail art tutorials, and beautifully photographed nails! The magazine only costs $11.95 for the entire year! So subscribe now, it's a steal!

I immediately knew I wanted to recreate this look that was pictured on page 105 of the March premiere issue. The combination of mint and coral is very on trend, along with the chevrons.

I started out with the intentions of copying the entire design, but once I got into it.... I realized it was simply going to take toooooooooo long! So I broke it down and just painted the rest of my nails with a basic hint at the design.

 My thumb was white with a black triangle half moon.

Here is the pinky design, plus a picture by picture tutorial!

1. Paint your nails white and let it dry (I used Sally Hansen Lavender Cloud). Then apply the striping tape as shown. 
2. Fill in the negative spaces with the corresponding polishes: Sinful Colors black striper, Orly Ancient Jade, & China Glaze I Wanna Lei Ya.
3. Use your black striper to freehand the half moon triangle.
4. Remove the tape and top coat!

Here is the index finger design.

1. Paint your nails white and let it dry (I used Sally Hansen Lavender Cloud). Then apply the striping tape as shown. 
2. Apply the mint and coral polishes. Orly Ancient Jade & China Glaze I Wanna Lei Ya.
3. Apply the black striper polish, just freehand the half moon area.
4. Remove the tape and topcoat!

So pretty!

More aboutMint & Coral Chevrons

Born Pretty - Foil Metal Bows

I recently received these gold metal bow decals from Born Pretty to review. Here is the look I came up with.
They can be found here for $8.80. 
There are 1,000 bows in each pack.

I stated by painting a basecoat, then taped off french tips and added Sinful Colors Let's Talk (it's much more purple IRL, less blue). Once that was dry, I placed gold striping tape along the smile line. Then I used my topcoat to attach the bows, and 2 coats over top of them to seal them in.

The bows are completely flat, so they wanted to stick up and have rough edges. The material is a thick foil, so I was able to bend them around the handle of my dotting tool with just my fingers to curve them. That helped them to sit better on the nail, but it didn't fix it entirely.

My opinions:
  • I wish they would sit better on the nail. They still managed to stick up some which irritates me. 
  • The quality is very good and unlike some cheaper alternatives where half of the bows would be defective... all of these were just right. 
  • I wish it were offered in smaller quantities for a lesser price. I don't see myself ever being able to use all 1,000.
More aboutBorn Pretty - Foil Metal Bows

Thanks again Pinterest.

I loved this design on Pinterest and I adapted it to accent nails. The polishes I used are Sinful Colors Rainstorm & Snow Me White. Red acrylic paint for the hearts and striping tape to make the lines so straight.

I mixed it up a bit for the other hand.


This design was inspired by this look on Pinterest. I cannot for the life of me figure out the specific post it came from. :( That can be a bad thing about Pinterest. Here it is:
More aboutThanks again Pinterest.

Classy Neutral

These were inspired by this design I found through Pinterest. It's a clean look with a classy touch.
 I used Lime Crime Milky Ways, Essie Sand Tropez, & Sinful Colors Black on Black. The silver striping tape is from Born Pretty.

Have you been inspired by any designs showing up on Pinterest? Share them with me! I'd love to see more great designs.
More aboutClassy Neutral

Nautical Striping Tape

I went a little wild with my striping tape, once again. This time I used red and blue for horizontal stripes. Then I added gold microbeads placed in the shape of an anchor. :)

The base polish is Sally Hansen Lavender Cloud.
Both colors of striping tape came from here.
The microbeads came from here.

I just placed the beads individually while the topcoat was still wet.
Remember my other nautical looks?
Here, and here!
More aboutNautical Striping Tape

Woven Striping Tape - Take 2

Here is another color combination I did using my method of weaving with striping tape.

The polishes I used are China Glaze Electric Beat & Re-fresh Mint.

The striping tape I used both then and now are from Born Pretty and can be found here.

FUN!
More aboutWoven Striping Tape - Take 2

Woven Striping Tape + Tutorial

This is one of those ideas that strikes you first thing in the morning, just out of no where. You think it's a great idea, but probably going to be an epic fail once you try it. This time it worked out for me though! I'm so happy with how it looks and I hope I can explain it in a way you can recreate it for yourself.

Paint your base polish. Here I used 2 coats of China Glaze Dance Baby. Then apply a fast dry topcoat. I used Seche Vite. This steps helps to speed things up and you can move on to applying the tape strips.

Then cut rough lengths of striping tape and start at the cuticle. Apply one color of striping tape horizontally. Apply a 2nd color strip of tape lengthwise. Just lightly press them down.
  
Apply all of the lengthwise pieces and lightly press down. Arrange them so that they alternate going over or under the horizontal piece.
You'll probably find it easier to use tweezers to apply the tape.

Using your tweezers, pull back every other strip just to where the horizontal piece is.

Stick down another piece of the horizontal color. Put it on top of the pieces that are still lying flat, yet make sure it goes under the pieces you previously pulled up.

 Repeat the process going down the length of the nail. 

Then clip off all the little ends that hang off and topcoat.

Here maybe you can see the pattern better because there isn't a glare off of the tape.


What do you think? I wouldn't recommend doing all of your nails this way, that would be awfully time consuming! Maybe stick to an accent nail or two? Enjoy!
More aboutWoven Striping Tape + Tutorial

Palate Cleanser

I went for a bit of a boring just the other day. I wanted to revert back to the boring white french tip that was my go-to manicure for years. It only lasted a day before I got tired of it. My! How things have changed!
 Sally Hansen CSM Lavender Cloud for the tips. China Glaze Innocence for the sheer pink portion.

I used Scotch Tape to mask off the tips. I didn't freehand this time!
More aboutPalate Cleanser