Showing posts with label teal. Show all posts

Chevrons With Craft Scissors

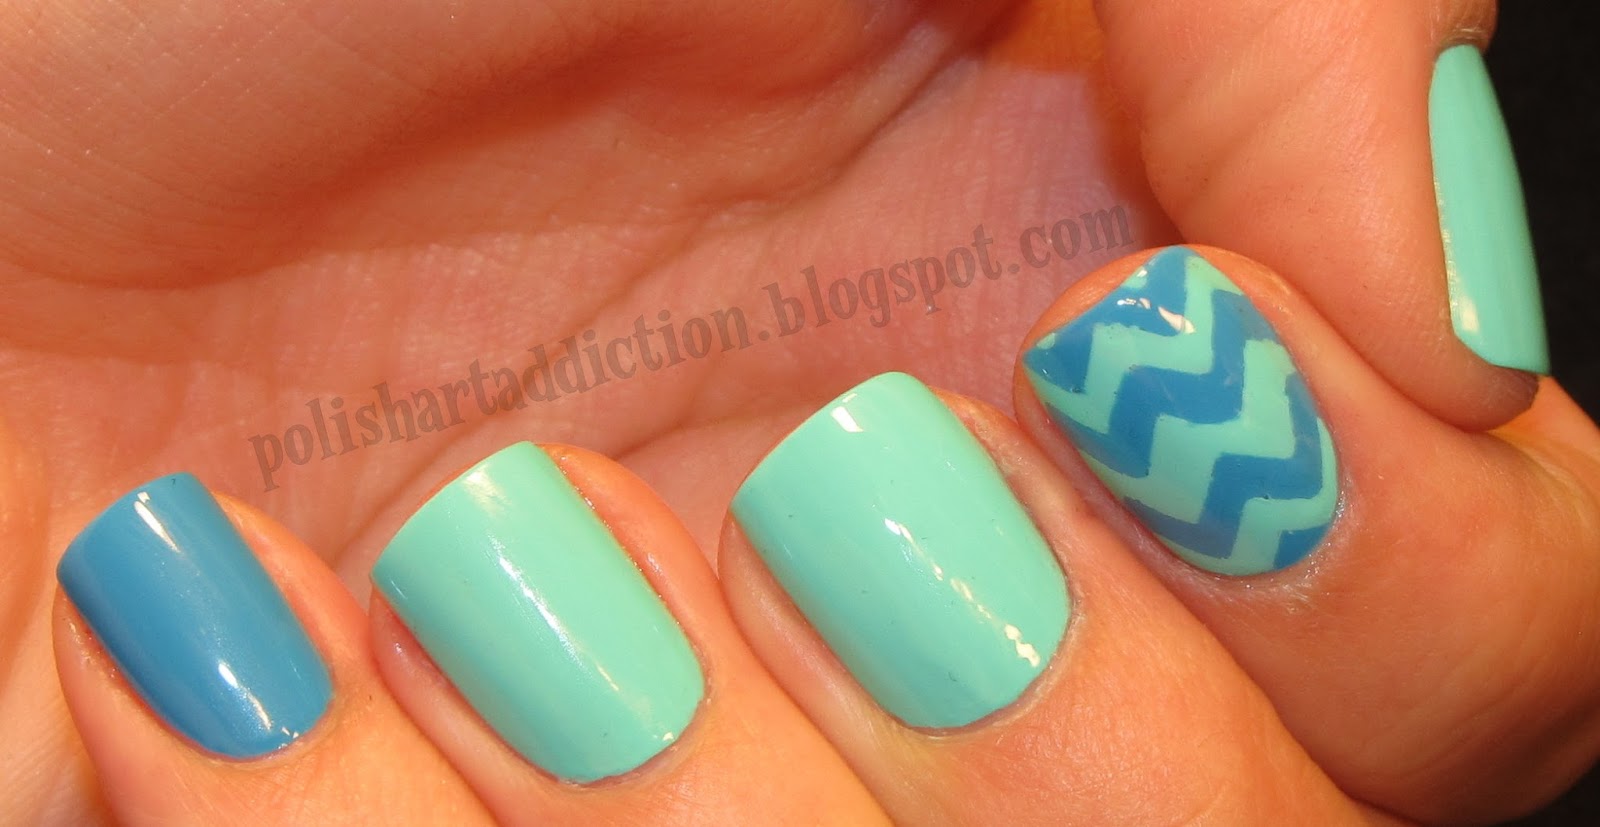
These colors compliment each other so well! China Glaze Too Yacht To Handle & Sunday Funday! I did a simple mixed up look with two accent nails of chevron pattern. For the chevron nails I just cut some strips of scotch tape with those zigzag crafting scissors to mask off the chevrons.


 These got a lot of attention at work!
More aboutChevrons With Craft Scissors

Twilight Gradient

Not like the movie Twilight, just in that this is reminiscent to the sky at dusk.

China Glaze Too Yacht to Handle
OPI Dating A Royal
Sinful Colors Black on Black


These pictures were after a days worth of wear, so that's why they are kind of dinged up if you look close.
More aboutTwilight Gradient

Mosaics

I wanted to experiment with a random pattern of striping tape to get a mosaic look. I felt like these colors made for a unique combination.

I used Sinful Colors Snow Me White (let it dry THOROUGHLY) then masked off the geometric shapes with striping tape. I then filled in each section with polish and removed the tape before it had a chance to dry much. 

The polishes I used were: 
  • China Glaze Lemon Fizz
  • Orly Ancient Jade
  • Sinful Colors Rainstorm
  • China Glaze Passion For Petals
  • China Glaze Sea Spray


More aboutMosaics

Mint & Coral Combo

I can't seem to get tired of mint and coral as a color combo. For this look I threw in some lilac and black for a funky striped skittle mix.
I used China Glaze For Audrey, Rimmel I Lilac You, & the coral is a franken I made up. For the accent nail I used a base of white polish and then striping tape to mask off the stripes of varying widths. The black polish was just my Sinful Colors black striper polish.


More aboutMint & Coral Combo

Experimenting with "shredded alcohol/hair spray water marble"

I saw this Nail Pop tutorial on Pinterest for turquoise stone type water marble. 
You just drop the polish in the water and then spray it with rubbing alcohol (I used hair spray). 
I used Wet N Wild I Need A Refresh-mint, and Sinful Colors Black on Black just to test run. Sorry that they are not more pictures, but after I uploaded them, I realized most came out blurry. :/
I think it looks awesome and I want to play around with it some more! I'll be sure to better document the process next time around ;)
More aboutExperimenting with "shredded alcohol/hair spray water marble"

Floral Skittles

I wanted to do another floral design, but this time I mixed it up with a skittle variation. 
 
I used a lot of different polishes:
Sally Hansen Complete Salon Manicure Cafe Au Lait
Lime Crime Milky Ways
Orly Gumdrop
Rimmel I Lilac You
China Glaze Spontaneous & Sunday Funday

More aboutFloral Skittles

Gumdrop & For Audrey Comparison

Kaitlyn wanted to see a side by side comparison of Orly's Gumdrop and China Glaze For Audrey because I mentioned they were near dupes.

I also added Wet N Wild I Need a Refresh-Mint because I find it's pretty close too.
If I had to find something different... I guess For Audrey may be a minuscule darker?
More aboutGumdrop & For Audrey Comparison

Orly - Gumdrop

Yet another Orly from Hautelook.

Gumdrop is originally from the "Sweet" collection from spring 2010. 
I've wanted it forever, but now that I have it... It's a near dupe for China Glaze For Audrey. Not really necessary to have both in a stash. Pictured is 2 coats.


I threw on some random dot nail art with the other "Sweet" collection polishes that I already had.
Orly Snowcone & Lollipop.


More aboutOrly - Gumdrop

Mixed Caviar

I whipped out the microbeads to try out another caviar manicure. It's a shame these don't last longer because they look so cool.
The polishes I used are Orly Ancient Jade, Orly Calypso Breeze, & China Glaze Spontaneous. 
The microbeads are from the "Recollections" brand sold at Michael's. I mixed up some of the blue, green, and purple for this random arrangement.


More aboutMixed Caviar

Heart Studs

I really wanted the oversized heart studs to work, so I molded them around my dotting tool until they were curved enough. It was pretty easy because the metal is soft. It worked perfectly to fit them to the curve of my nails. These studs can be found here for $4.89.
 My base polish is Color Club New Bohemian.

 I applied 2 coats of topcoat over the studs and I still managed to lose most of them by the end of the day. I think the topcoat has a hard time adhering to the metal of the studs, so it scrapes off with normal wear, and then edges free up and snag enough to pop off.
Regardless, it's a beautiful manicure for about 12 hours! Even if that's the best you can get.

More aboutHeart Studs

Mint & Coral Chevrons

Inspired by "Nail It!" Magazine, the new nail polish/nail art magazine for non-professionals! It's wonderfully entertaining to read. All of the latest ads from big brands showing off the new collections, interviews with skilled professionals, tips and tricks, nail art tutorials, and beautifully photographed nails! The magazine only costs $11.95 for the entire year! So subscribe now, it's a steal!

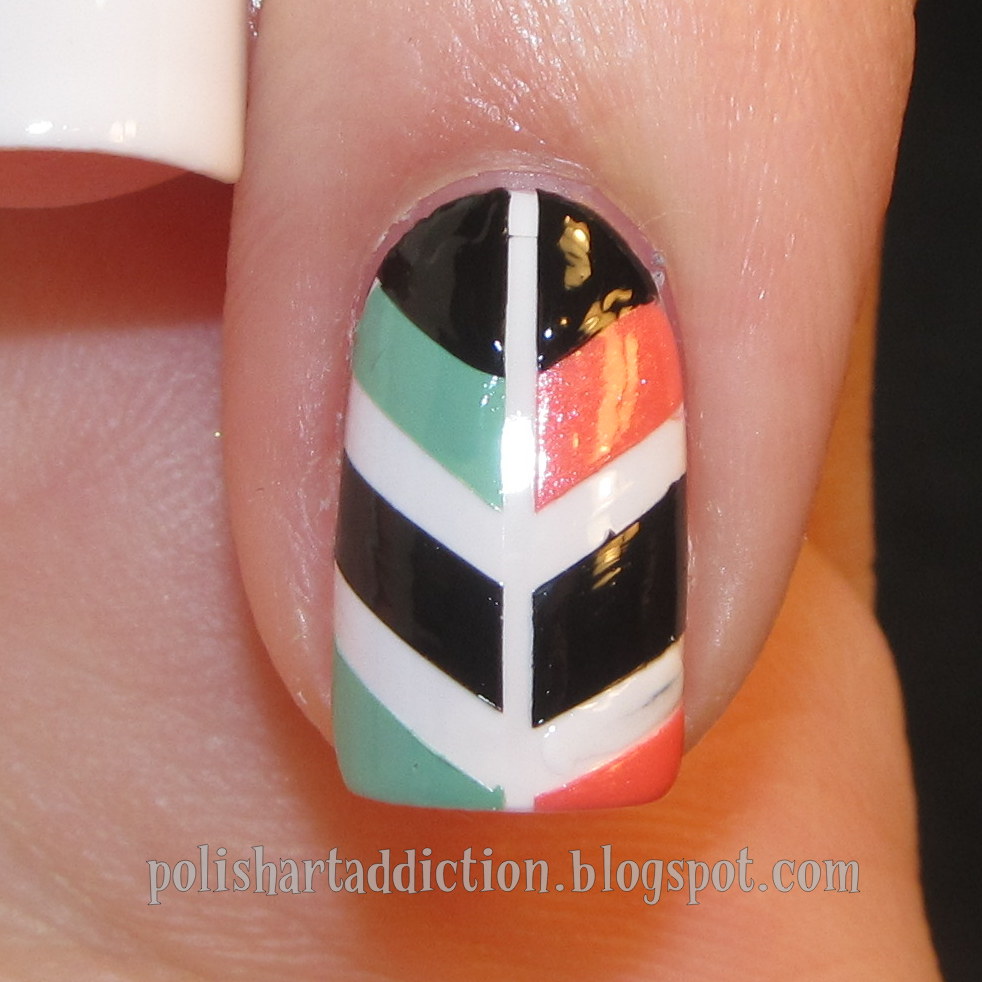
I immediately knew I wanted to recreate this look that was pictured on page 105 of the March premiere issue. The combination of mint and coral is very on trend, along with the chevrons.

I started out with the intentions of copying the entire design, but once I got into it.... I realized it was simply going to take toooooooooo long! So I broke it down and just painted the rest of my nails with a basic hint at the design.

 My thumb was white with a black triangle half moon.

Here is the pinky design, plus a picture by picture tutorial!

1. Paint your nails white and let it dry (I used Sally Hansen Lavender Cloud). Then apply the striping tape as shown. 
2. Fill in the negative spaces with the corresponding polishes: Sinful Colors black striper, Orly Ancient Jade, & China Glaze I Wanna Lei Ya.
3. Use your black striper to freehand the half moon triangle.
4. Remove the tape and top coat!

Here is the index finger design.

1. Paint your nails white and let it dry (I used Sally Hansen Lavender Cloud). Then apply the striping tape as shown. 
2. Apply the mint and coral polishes. Orly Ancient Jade & China Glaze I Wanna Lei Ya.
3. Apply the black striper polish, just freehand the half moon area.
4. Remove the tape and topcoat!

So pretty!

More aboutMint & Coral Chevrons

Disney Princess French - Tiana Inspired

Here's another princess design! I painted her as her frog version self on my thumb. I hoped it would turn out better, but I should have used a different background (it's Orly Ancient Jade). 
It simply blends in too much... :(


I started with masking off my tips and painting Essie Navigate Her.
Then I stamped an image from Konad m36 with Orly Ancient Jade 
(it transferred very lightly which was my intent)
Then I took China Glaze Adore and used my smallest dotting tool to go along the french tip.
Topped it with Seche Vite topcoat.

More aboutDisney Princess French - Tiana Inspired

Inspired by Young Wild and Polished

Another look inspired from a Pinterest find. This manicure from Young Wild and Polished.
I thought it was gorgeous and I just adore the color combination. 
 I don't have the exact polishes she used, so I used China Glaze Dance Baby, & For Audrey. Then Milani Orchida for the purple.
 3 color gradient sponge, and 2 different sizes of a dotting tool. Simple to recreate!

More aboutInspired by Young Wild and Polished

Pshiiit Inspired Ikat Pattern

I've never tried the "Ikat" pattern for nail art, but these from Pshiiit really stood out and I just had to. 
The polishes I used were China Glaze For Audrey & Sinful Colors 24/7. The black and white were both acrylic paint.


 Click to enlarge for a step by step if you're looking to recreate them for yourself.

More aboutPshiiit Inspired Ikat Pattern

Sponge and Stamp

These nails were directly inspired by Lachesis and Co. I used a slightly different teal polish because I don't have Turned Up Turquoise in my stash. I used Sinful Colors Savage.


Here is a photo progression of how I did these. 
Started with a base of Sally Hansen Complete Salon Manicure Lavender Cloud.
Sideways sponge gradient with SH LC and Sinful Colors Savage.
Stamp with BM12 and Konad Special Black polish.
Finish with Seche Vite topcoat.

More aboutSponge and Stamp