Showing posts with label Water Marble. Show all posts

KBShimmer Totally Tubular Inspired Nail Art

(**Press Samples**)
Hello everyone and happy Thursday! 

  Today I have a crazy busy manicure haha! I'm kind of calling this my "kitchen sink mani". I just couldn't stop doing things to my nails. The whole idea originated from my bottle of KBShimmer's Totally Tubular. I kept swirling it in my hands and being hypnotized by the amazing blend of colors and shapes. And so this mani was born, inspired by the beautiful colors in Totally Tubular. I will be sharing swatches of KBShimmer's full Summer collection very soon! 
KBShimmer and Bettina photo DSCN6090_zps03c78e5e.jpg
 On my middle nail is Totally Tubular by KBShimmer. I will be reviewing the polish itself soon. For now, I really want to focus on this colorful nail art that got me through my days at the Mayo Clinic.
  So, as I mentioned above, the nail art itself was inspired by the colors in Totally Tubular. I loved the mix of Teals, Magentas and Blues. So, on all my nails but my middle nail I did a White base of Cult Nails Tempest. For my water marbled nails I used Bettina Aqua, Pink Bikini and Premium Wash. I then topped off my marbled nails with O.P.I Polka.com.
 For my gradient nails I used Bettina Picnic, Sparkle and Glitter Jean. I topped off my gradient nails in Aphrodite Lacquers V.I.P Room. I finished off the entire manicure by topping all of my nails off with some KBShimmer Clearly on Top and then some INM Northern Lights sparkle top coat.

 I CANNOT believe I forgot to take pics of my thumbs! I really loved how the marble pattern turned out on them. I had never been able to get a full flower design on my nails before! So, I'm so sorry, but here are some crappy cell pics of my thumb marbles. I think they were about Four days old at this point. 
 photo 135f4825-398b-409f-802c-a7e181cf6cac_zpsb0533691.jpg
 I loved wearing these nails. My days at the Mayo Clinic were really intensive, exhausting and not entirely successful.. But my nails were looking FIERCE the whole time. I got so many compliments from  people while I was there. It was nice to have the distraction of my colorful nails and hair while I was going through all that stuff. 

  Oh and some cool stuff happened right before the Mayo trip. I got to meet the awesome Kelly of vampyvarnish.com!! It was an awesome lunch meeting with my Florida beauties and Kelly. Thank you Courtney for the lovely photo!! From L to R: Steph of Imperfectly Painted, myself (goodness I need to do my roots soon!!), Maria of Cult Nails, Kelly of Vampy Varnish, Kari of Once Bitten and Courtney of Phyrra. 
Thank you all for stopping by today!! If you have any questions about Mayo, feel free to ask in the comments, I will try my best to answer them. I just didn't want to get into all that in the post itself. 

XO!
More aboutKBShimmer Totally Tubular Inspired Nail Art

Inglot Spring Pastels 2013- Watermarble Nail Art

(**Press Sample**)
Happy Humpday!! 

  I am at such a loss of words today :-S. So much has happened over the last few days that I don't even know where to start. There has been some utter, horrid nonsense going on; Muffin's been sick, I've been sick, husband got laid off.. It was hectic for a few weeks, but hings are settling down now. 
  Among all the madness some really awesome things happened too. If you pick you the latest issue of Nail It! magazine, you will see a picture of a manicure by yours truly featured in the Snapshots section. It is SO cool to see my nails and name on an actual magazine! That had been one of my goals for some time now.
 Anywho, these are my very first Inglot polishes, and I can honestly say I am a fan. They released a range of 10 pastel shades for Spring 2013 Ranging from Yellow-toned Peach, to Aqua Blue; these colors were begging to be played with. I immediately knew I wanted to do a marble-skittle of sorts with these. These Inglot polishes have a great formula for watermarbles, great pigmentation a really good spread in the water. 
 photo DSCN5480_zpsabb72828.jpg
 For this look I started with a White base done with Cult Nails Tempest. For the Pinkie and Index marbles I used Inglot 381(Orange toned peach), 390(Vivid Mint Pastel) and 383(Orange toned Coral). For my Ring and Middle nail I used 382(Yellow toned Peach), 387(Soft Lavender-Pink) and 389(Aqua Blue). All of these Inglot polishes have a creamy formula. I'm not sure if it was just me, but I was detecting the slightest hint of shimmer, so barely there it is not really worth mentioning. I think it definitely aids in the application. 
  To finish off my look I top coated my Pinkie an Index nails in my signature sparkling INM Northern Lights, followed by a coat of Cult Nails Wax That, wax finish top coat. To cover some bubbles I got on my Middle and Ring finger I did a light coat of Lynnderella Connect the Dots, followed by Cult Nails Wicked Fast to give the glitter a high shine. 

  I am loving the contrast of  colors in these marbles, and I really love the completed look. I am also loving what CtD did for my bubbly nails. Overall, I am so happy with how this turned out. I don't marble enough for how much I love the look of the technique. And you know what they say, practice makes perfect. I feel my confidence in my marbling grow with each marble mani I do. They are becoming more fun now that I am getting a good grasp. I think I finally feel comfortable about filming a tutorial about the way I marble. 

 How do you feel about watermarbled nails? Also, would you guys be interested in a tutorial? Let me know in the comments ♥. 
(**Press Sample**)
More aboutInglot Spring Pastels 2013- Watermarble Nail Art

Neon splatter/shredded/hair spray marble

I tried to play around again with the shredded effect/hair spray on a water marble (first attempt was here) I wanted to see if I could mimic this look from amkuch15, white base with neon splatter.
This is Sinful Colors Snow Me White, Wet N Wild Pom Pom Kelly, & Wet N Wild Nerd Alert: Screech.


I first tried layering 4 different neon shades, but I couldn't get consistent splattering sizes so it was just a garbled mess. :( Too, this entire process was a big pain in the butt. These 4 nails took me several hours. No joke! It was ridiculous. Maybe it was the particular aerosol hairspray I was using, but sometimes it would just create big spots in the polish, then the next time it would blow all the polish to the edges and shred it into tiny little specks. So frustrating.
More aboutNeon splatter/shredded/hair spray marble

Experimenting with "shredded alcohol/hair spray water marble"

I saw this Nail Pop tutorial on Pinterest for turquoise stone type water marble. 
You just drop the polish in the water and then spray it with rubbing alcohol (I used hair spray). 
I used Wet N Wild I Need A Refresh-mint, and Sinful Colors Black on Black just to test run. Sorry that they are not more pictures, but after I uploaded them, I realized most came out blurry. :/
I think it looks awesome and I want to play around with it some more! I'll be sure to better document the process next time around ;)
More aboutExperimenting with "shredded alcohol/hair spray water marble"

LVX Watermarble for Autism Awareness Month

(**Press Sample**)

Good am and happy humpday! 

  For today's look I decided to do a watermarble that used the colors for Autism Awareness. I was thinking along the lines of the puzzle piece ribbons. These ribbons usually feature the primary colors, Red, Blue and Yellow. This was my first time marbling with LVX nail polish, and they were amazing! Sorry about the greasy fingers. My tips were SO dry after the marbling and cleanup. They were starved for some moisture. 
 For this marble I started with a base of LVX Fantom. For the watermarble portion I used LVX Cerulean(Blue), Citrine(Yellow) and Fantom. Once my marble was nice and dry I accented the swirls with some small Red dots using Bettina Be Jolly. The final touch was a light coating of INM Northern Lights top coat. 

 Here is a swatch of my base shade Fantom. This is a stark White creme. The formula on this White creme was a little streaky. I had to keep a very light and steady hand to avoid bald patches. I used Three coats for full, even opacity.
 I normally only marble with Bettina polishes because they really take the guessing out of marbling for me. But these LVX cremes were just about PERFECT for this technique as well. They have a really good spread in the water and the pigmentation is just right.  I also had no issues come cleanup time. These come off clean and don't stain the skin.

Thanks for stopping by my loves!

(**Press Sample**)

More aboutLVX Watermarble for Autism Awareness Month

Muffin Mon... Er... Tuesday? O.P.I Euro-Marble

Hello lovely people!! 

  So... I'm late with this post :(. Yesterday was not a good day for me. I woke up pretty sick and whatnot so... Needless to say the polishing was not happening. Today I woke up feeling better, but still quite out of it. I'm sorry this post is so late and short. I've really been struggling with my health and energy lately. I would love some consistency right now :-s.
 This look started with a clean White creme base. I did a Blue themed watermarble with some of the new O.P.I Euro-Centrale shades. I used You're such a Budapest, I saw...U saw.. We saw... Warsaw and Can't find my Czechbook. I always foget how much of a pain it it to clean up Blue polish after marbles. Well, for me at least. Once I was done with the cleanup, I was not entirely happy with my marble. So I topped it with my secret weapon, INM Northern Lights. When that didn't save it with for me I did a Konad stamp from plate M63 in Konad Black special polish. I then went back and topped the whole thing off with O.P.I Don't touch my Tutu to give it an "underwater" look. I actually really adore the finished look. I'm glad I stamped and sammiched the whole look.
 
 Muffin is being a princess lately.... And hey!! It's a Truffle photo-bomb!

 Here is the marble before I stamped over it. IDK what it is but I was not really happy with it... :(
That is all for me today. I hope you guys like this mani. I'm so sorry I was late and short. As soon as I am feeling better I will be back up to full speed. In the mean time, if I disappear for a little bit, don't worry! It just means I need a little break and will be back shortly!

(**OPI products provided for my consideration**)

More aboutMuffin Mon... Er... Tuesday? O.P.I Euro-Marble

31 Day Challenge 2012! Day Twenty: Watermarble

T-t-t-Tuesday!! 

  And that means it is time for another 31 Day Challenge prompt! I cannot believe we are already on Day 20! I know Miss Sammy was not looking forward to today's prompt. I'm not sure about Miss Rie but I don't think she was too excited either lolol. I remember when I used to dread marbles. They are still not my fave to work on. I love the finished look of marbles but I'm not fan of the actual process of doing them.  
  The other thing I can't seem to master is the swirls. Some girls can get such kick ass designs and swirl patterns on their nails using this technique. I seem to get blocked when it comes time to swirl my colors and I always end up with random patterns and no clear defined design. Instead of going for something specific this time I went for a flowing floral type of look. For this marble I used this image of a Parrot Tulip as my inspiration for the colors. Mr.LTHP said this reminded him of '70s Style dresses... I see it too.
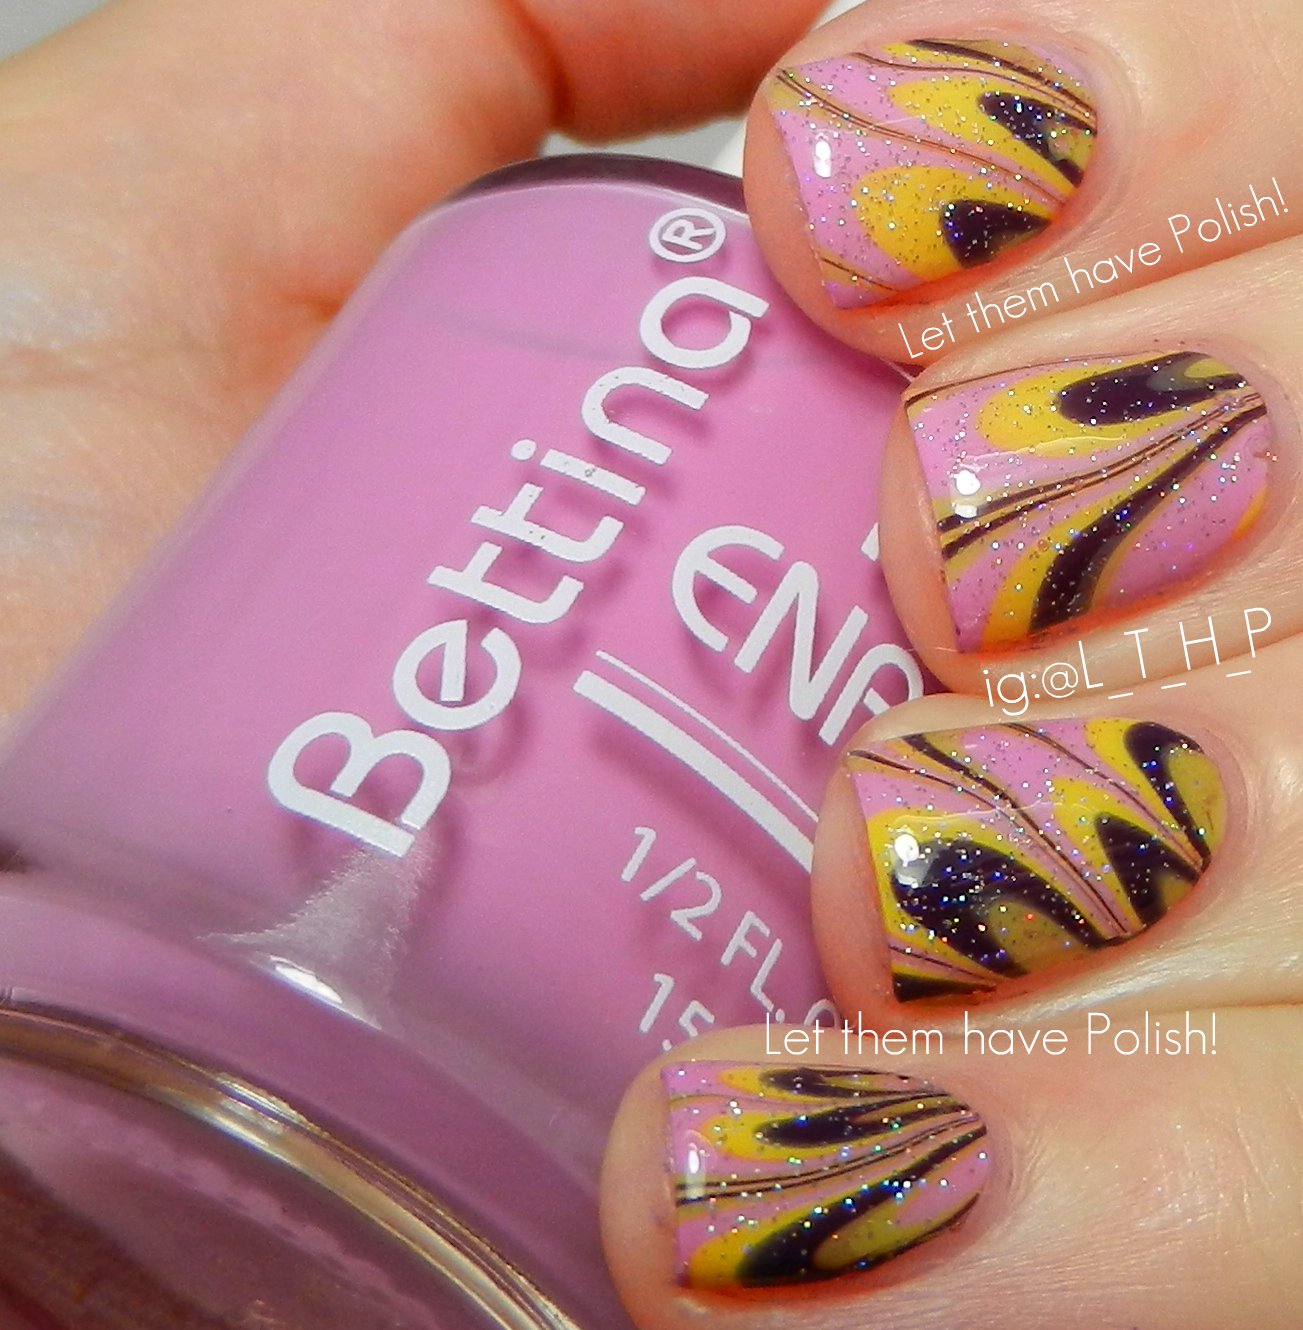
 This look started with a base of Two coats of one of my "go-to" shades, Cult Nails Enticing. For the marbling swirls I used Bettina's Ortensia, Yellow, Glacinto and Zoya Monica. I wish everyone had access to Bettina nail polish. The texture and pigmentation of the Bettina polishes makes them perfect for watermarbles. I topped the whole mani off with some Seche Vite followed by a coat of INM Northern Lights. I really love the contrast of colors in this manicure and how the sparkle from Northern Lights looks like morning dew. 

Now don't forget to stop by my challenge partners Rie and Sam's to see their Marbled looks for day 20!
More about31 Day Challenge 2012! Day Twenty: Watermarble

31 Day Challenge 2012! Day Nine: Rainbow Nails

Happy Thursday! 

  Today Sam, Rie and I will be taking on the Ninth prompt in the 31 Day Challenge. The task for today is Rainbow nails. I couldn't think of a better way to do a full rainbow look than by doing a watermarbled look. A LONG time ago I did a rainbow marble for the lovely Kellie and ever since I have been wanting to re-visit the look. Rainbow lollies for everyone!
 This look features all Bettina colors for the swirls. They are #15, Purple, Premium Wash, Mojito, Yellow and Starfish. The base is one coat of Milani's White on the Spot. Because, in my book, a watermarble is not complete until there is some sparkle, I added a coat of Twee & Honey's Fairy Farts. I topped the whole thing off with some Seche Vite.

 I love marbles with lots of colors. Bettina polishes are THE BEST for this technique! Now don't forget to stop by my challenge partners Rie and Sam's to see their Rainbow looks for day Nine!

More about31 Day Challenge 2012! Day Nine: Rainbow Nails

#AwesomeNailsAreAwesome Guest Week! Featuring Jeanette The Swatchaholic

Good Morning and happy Caturday!! 

  Today is "nail crush day" here at LTHP. The Two ladies in charge of today's guests posts have been my biggest nail crushes for a long time!! I love all different shapes and sizes of nails but a true stand-out in nail perfection is Jeanette of The Swatchaholic. Jeanette has beautiful hands and nails and everything she does is perfection, from execution to photographs. I can't get enough of J's amazing nails! I really HIGHLY suggest clicking these to make them larger! 
---

Cristina is one of my biggest nail crushes and I admire her and her stunning nail art skills. She is so talented and I am always in awe with her creations. ❤

 When Cris asked me if I would like to write a guest post I was honored and then a little terrified about which manicure I could make. But when I recently made my
first baby steps with water marbling I knew that my next water marble would be for Cris. :)
Last week finally a store from the Turkish brand Flormar opened in my town and of course I went a little shopping crazy. The reason why I was especially excited about the
opening is one of their nail polish ranges which previously wasn't available in Germany: The Supershine Miracle Colors. They are glass flecks heaven and their finish is comparable to the
Color Club Take Wing, Orly Cosmic FX or the Bettina Disco collections. There are 34 of them in Flormar's assortment and I bought most of them the day the store opened. But hey they were on sale! :D
This water marble is just my second water marble ever and it took quite some time because my first choice of colors just worked ok-ish together. I couldn't get a nice flower design on 
my ring finger and pinkie nails because the colors didn't spread nicely enough in the water. Lesson one for water marbling learned: if possible marble with nail polishes from the same brand.
I left the old marble - a subtle shimmery blue water marble - on my nails and picked Flormar U25 (a vibrant glass fleck nail polish with a blue jelly base and pink/green duochrome glass flecks) and Flormar DC03 (a copper/gold/green metallic duochrome from their current limited edition) and this time they've spread perfectly in the water and creating the flower design was much easier.
I only needed two water marble flowers for this attempt and now my wishlist for more of their nail polishes got even longer because these worked so perfect for marbling even
for a beginner like me. :)
Glass flecks I love thee! I could stare at close-ups of glass flecks nail polishes for ever. :D

I hope you all enjoyed my second baby step in water marbling and thank you so much Cris for having me here on your blog. Get well soon love! *squishes* ❤
---- 
 Ummm!?? Are you kidding me?! These are just fantastic!! I've never really seen a marble like this one. I love the "oil-slick" look she created with these beautiful polishes. I'm actually a little speechless at how beautiful these are. Just look at that macro shot!!! If you don't drool over that... Then you must not have a soul or something lol because it's just STUNNING! Thank you SO much Jeanette for this stunning nail art you have created! 
More about#AwesomeNailsAreAwesome Guest Week! Featuring Jeanette The Swatchaholic

Closing Zoya Week with a Designer Marble

You didn't think I'd forget did you? 

  Along with my blog's Two Year Birthday today also brings Zoya week to a close. This last look is a watermarble that features Three colors from the Designer Collection for Fall 2012. I hope you guys enjoyed all these looks I've been featuring over the past few days. I had a lot of fun being inspired by these colors. 
  This marble started with a base of Zoya Dove, which might have been a tad too dark. The marble colors feature Zoya Evvie, Monica and Nattie. Since it was so dark and smokey I did some dots in Dove to accent some of the swirls. I really need to do more marbles to get better at the swirls. I like these colors together.
Thanks for stopping by again and I hope you enjoyed this Zoya Week!

(**Zoya products provided for consideration**)

More aboutClosing Zoya Week with a Designer Marble

China Glaze Summer Neons Weekend Mani

Hi loves!!

  Today I have a mani I did last Friday to rock during this, most eventful, weekend. I really wanted to do something that was eye- catching and colorful so the choice was made that I would be doing something with a watermarble. I know I still owe you guys swatches of the China Glaze Summer Neons 2012 but I cannot stop playing with them in terms on nail art. Here is what I landed on.
  For this tropical mani I started with a base of One coat of Milani White on the Spot. Once my White canvas was dry I went to town with colors. There are few things I love more than seeing a plain white canvas be transformed. I went for the Index/ Middle finger accents in gradients. For the gradient nails I used Surfin for Boys, Beach Cruise-r and Ride the Waves. For the gradient technique I tried yet another tutorial which I have posted below. For the marbled nails I used Loves a Beach, Splish- Splash and Sun Kissed. I just love all these colors together. Just TOO much fun!  Of course they were topped off in my mandatory coat of INM Northern Lights and Seche Vite.
 I kind of sort of love how the pigments in the color blended together in the marbling to create new colors on top of the already awesome neons. I got tons of compliments on these and I was so not looking forward to taking these off. I really cannot wait to show you guys swatches of these China Glaze Summer Neons.

**EDIT** For my marbled fingers I used filtered water and in shot glass. I found that using a shot glass allowed me to get more swirls onto my tiny nails than the small paper cups I had been using. Since the shot glass is such a small diameter it requires less polish to create a tight bullseye. 

Here is the tutorial I followed for my gradient. Nikkie used a nude base, which I realize now I should have done on my gradient nails instead of my white base. I love this girl. She is crazy talented!
Thanks for stopping by!

(**CG Summer neons provided for review**)

More aboutChina Glaze Summer Neons Weekend Mani

31 Day Challenge - Day 20 - Water Marble

The Tazmanian Devil! I wanted the marble to represent the chaos tornado that was his method of travel.
This didn't turn out exactly like what I had in mind, but it's the best I could do considering that I'm not well acquainted with water marbling. It's just not my preferred method of nail art. I don't have a lot of practice, and it took me over an hour to just get 3 nails done! My design in the water kept looking like crap.
In the end I seem to have combined every nail art technique known to man in one manicure. 
Water marbling, polka dots, freehand, and rimming the edges.

Here's a GIF of how I painted Taz.
make an animated gif
This was my first attempt at this manicure. 
I wanted spiral designs, but it mostly ended up looking like Agate stones. I had finished this late into the night and didn't have time to paint Taz then. And I didn't like the gray patches. So I just removed it and attempted again another night.

This was the next opportunity I had to watermarble. I settled on just trying to get vertical stripes across the nails. The middle nail and thumb were the closest to what I had in mind.

I had seen someone that posted simple polka dots on top of their water marble to hide the bubbles or flaws. So I went with that. Lol. Again, it ended late into the night and had to go to work the next day, so I left it at this stage.

The next night, I freehanded Taz on the index because that was my least favorite marble design.

I had some minor tip wear, but a good deal of shrinkage around the cuticle from a coat of Seche Vite over a long since dry manicure. So to hide that I did some "rimming" or freehanding a border/frame around each nail. I just used a Kiss Nail Art Striper in black. Then another coat of Seche Vite.
I was undecided at first, but I think I like how it turned out!
More about31 Day Challenge - Day 20 - Water Marble

Nails by Cristina feat. Jennifer

Hi loves!

  Today I will be showing you a manicure I did for the lovely Jennifer who is the mastermind behind Redhead Stepchild Designs. I love her knits and I wish it was colder here so I could wear my pretty stuff I've gotten from her more often. I did a watermarble for Jennifer. This was the very first time I did a watermarble on anone else and I could not be more thrilled with the final results. It was a joy to work on Jen's nails because she has really pretty long nails.
  I'm not used to seeing my pretty swirls on my nails since they are so tiny but it was amazing to see her coloful nails. We chose the colors based on the dress Jennifer was wearing when she came over that day.
 For this marble I started with a base of one coat of Milani White on the Spot. For the marbling I used all Bettina colors (Big Shocker there, huh?!) Indigo, Green, Starfish, Sunrise and #187. We both could not help but "ooh and ahh" at each nail as it came out of the water. This was so much fun to work on and Jen was a sport about how long it took me for being my first time :D. Aren't these seriously just awesome though? I topped her off with Some SV followed by some Northern LIghts of course.
Be sure to check out Jennifer's shop!  I seriously had a blast working on these and I so want to do more marbles!!! I hope you guys like these as much as Jen and I did!

Thanks for stopping by!

More aboutNails by Cristina feat. Jennifer

Design-Seeds Inspired Nail Art Series: Hummingbird Hues Watermarble

HI loves!

  Sooo!! Today I will be starting a little series that will go on pretty much indefinitely. Thanks to the amazing Steph from Imperfectly Painted I have become completely obsessed with Design Seeds. I have literally spent hours just going through all the amazing color palettes and getting so many ideas and so much inspiration. I could not help but want to make a series out of all the manicures I want to do based on these color boards.

  For this first manicure I was inspired by the awesome contrast in the Hummingbird Hues palette. I love the unexpected mix of colors but how perfectly they all go with each other.
 For this marble I started with a One coat base of Milani White on the Spot. For the marble I used all Bettina Colors. They are: #187(Magenta), #197(Grey), Stiletto(Nude), Green, Indigo, Sand Blast(Light , almost White Grey). I ended up wearing this mani for a very long time. This was also only the Second time I have watermarbled all 10 nails! I felt so accomplished and could not stop staring at my pretty marbled nails. I topped it all off with some Seche Vite and INM Northern Lights.

Just for fun here is the palette that inspired this color combination.
If you have never checked out Design Seeds you totally should! This site is such a great source of ideas!

Thoughts on the Design Seeds series?
More aboutDesign-Seeds Inspired Nail Art Series: Hummingbird Hues Watermarble

Merry Christmas!!! Holiday Watermarble with Bettina Nail Polish

Merry X-mas Morning and happy Sunday!

  I hope Santa brought you all what you wanted. I don't know what he brought me yet because I've yet to open presents but I know they will be good. I will be back later or tomorrow and I'll tell you guys what I got. Tomorrow is very special as well. It is my Mommas birthday as well as Miss Muffin's!!! SO she gets tomorrow off but I will be doing a special mani for her birthday. Today I have a special Holiday watermarble that looks like little Holiday candies.
  Mmmm candies!!! So for this marble I started with a base of one coat of Bettina Marshmallow. For my marbling colors I used all Bettina colors as well because I just love how they marble. I used Mojito, #15 and Marshmallow. I really liked how it looked but what is a X-mas mani without some glitter? So that's why I decided to add China Glaze's Party Hearty which is pretty much the ultimate Holiday glitter. To finish it all off I used Two coats of Hard Candy Mattely in Love because matte glitter is cool :D lol. Freaking love this!!

Here is the marble pre glitter. Here I had only applied a coat of INM Northern Lights.
 I hope all of those celebrating today have a wonderful Holiday and all those warm fuzzy sentiments and such lol. 

Merry Christmas!!
♥Cristina
More aboutMerry Christmas!!! Holiday Watermarble with Bettina Nail Polish

31 Day Challenge! Day 20- Watermarbled Nails

Hi loves!!

  Holy smokes! Day 20!!! I'm so not ready for Inspiration Week.. o.O.. But I was super eager to get working on my water marble for today's task. I went with a Halloween theme since LTHP has been lacking in the Holiday Spirit lol... I'm really happy with how these turned out for banging them out in 15 min.... Behold! lol
  I started with a base of Bettina Clouds and then marbled with the colors pictured below. I topped it all off with a coat of SV followed by my mandatory coat of INM Northern Lights. I just can't get enough of the hint of sparkle it adds.


Jacked up my index finger a little but I can live with it lol!
So that was fun! Now.. to go pick a color to be "inspired by..... lol" Don't forget to check out Sam and Rie's blogs to see their Watermarbled nails!


Thanks for stopping by!
♥ Cristina
More about31 Day Challenge! Day 20- Watermarbled Nails