Showing posts with label Cult Nails. Show all posts

Cult Nails Dance all Night Collection Swatches

(**Press Sample**)
Hello everyone! 

  Today I have swatches of the newest collection by my beloved Cult Nails. This is the Dance all Night collection. This release consists of Three lovely creme polishes, and Three fantastic layering glitterbombs. If you are not a part of "The Cult" yet, this is the perfect collection to start off with as it showcases the strengths of Cult Nails so well. There is a little bit of everything for everyone. 
CN Dance all Night photo CultNails2_zpsb9713f69.jpg
 Even though the collection is made up of "complimenting" pairs, I decided to do some more unexpected layering combinations to really make each color pop.

Cult Nails Center of Attention over Cult Nails Nakizzle's Shizzle
Cult Nails Center of Attention photo DSCN5749_zps037a879e.jpg
 Center of Attention is a magnificent blend of vivid Pink-Rose sparkling hexes in varying sizes accented by a heavy dose of smaller iridescent sparkles in a clear base. The slightly larger hexes have a very minimal curve to them, but they all lay flat. This polish is like a bouquet of sparkling flowers in a bottle. Formula-wise, it is a little thick, I did not find this to be a problem. I used One coat of Center of Attention over my sky Blue base. I could wear this layering combination for ages.

Cult Nails Nakizzle's Shizzle
Cult Nails Nakizzle's Shizzle photo DSCN5727_zpsb01af039.jpg
 Nakizzle's Shizzle is an amazing shade of vivid, clean Sky Blue creme. This is your quintessential shade of Sky Blue. This shade is beautifully bright, yet flattering and completely wearable. The formula on this color is Cult Nails at their finest; so glossy, even and smooth. This color practically applies itself, I used Two effortless coats for my swatch.

Cult Nails Walk of Shame over Cult Nails Love at First Sight
Cult Nails Walk of Shame photo DSCN5700_zps03cf2ccb.jpg
 Walk of Shame is a glitterbomb of most epic proportions. This glitter mixes bright, vivid Gold hexes in varying sizes and small Prismatic glitter in a clear base. This photo does not do this amazing, blingy topper justice. I tried taking photos in the Sun, and my camera freaked at the amount of bling. The formula on this glitter is also a bit thick, but very manageable. I used One coat of glitter over my Orchid- Violet base.

Cult Nails Love at First Sight
Cult Nails Love at First sight photo DSCN5650_zpsb97ebfb9.jpg
 Love at First Sight is another fantastic representation of what Cult Nails does best, AMAZIIIIIINGG cremes! This shade is a beautiful, feminine tone of light, Pink toned Purple. When I think of Orchid- Violet, this is what comes to mind. This color has an amazing glossy and smooth formula that does great in Two coats.

Cult Nails Dance all Night over Cult Nails Faded
Cult Nails Dance all Night photo DSCN5622_zps73ecd3b3.jpg
 Dance all Night is the namesake of the collection, and quite a beautiful topper. This glitter topper mixes Blue, Green and Iridescent hexes partnered with smaller iridescent sparkle in a clear base. The larger hexes in this polish also have a slight curve to them, but they do lay flat. The formula on this polish is also a bit thick, but as with the rest, I did not find this to be a problem. How awesome does this look over Faded?!

Cult Nails Faded
Cult Nails Faded photo DSCN5595_zps80e6845d.jpg
  Faded is a very faint, clean shade of Grey creme. This lovely shade of Dove Grey has an impressive formula. I really love this shade and I can see myself reaching for it a lot in the coming months. I used Two uber easy coats for my swatch. 

  These shades are fantastic and I can't even pick favorites. They all so beautifully executed, I really could not pick a favorite. These areso flattering, easy to wear and just plain FUN! Which are you loving?

PS: I want to thank you all for your support on the matter of Muffin. It really means a lot to Daniel and I. 

More aboutCult Nails Dance all Night Collection Swatches

Inglot Spring Pastels 2013- Watermarble Nail Art

(**Press Sample**)
Happy Humpday!! 

  I am at such a loss of words today :-S. So much has happened over the last few days that I don't even know where to start. There has been some utter, horrid nonsense going on; Muffin's been sick, I've been sick, husband got laid off.. It was hectic for a few weeks, but hings are settling down now. 
  Among all the madness some really awesome things happened too. If you pick you the latest issue of Nail It! magazine, you will see a picture of a manicure by yours truly featured in the Snapshots section. It is SO cool to see my nails and name on an actual magazine! That had been one of my goals for some time now.
 Anywho, these are my very first Inglot polishes, and I can honestly say I am a fan. They released a range of 10 pastel shades for Spring 2013 Ranging from Yellow-toned Peach, to Aqua Blue; these colors were begging to be played with. I immediately knew I wanted to do a marble-skittle of sorts with these. These Inglot polishes have a great formula for watermarbles, great pigmentation a really good spread in the water. 
 photo DSCN5480_zpsabb72828.jpg
 For this look I started with a White base done with Cult Nails Tempest. For the Pinkie and Index marbles I used Inglot 381(Orange toned peach), 390(Vivid Mint Pastel) and 383(Orange toned Coral). For my Ring and Middle nail I used 382(Yellow toned Peach), 387(Soft Lavender-Pink) and 389(Aqua Blue). All of these Inglot polishes have a creamy formula. I'm not sure if it was just me, but I was detecting the slightest hint of shimmer, so barely there it is not really worth mentioning. I think it definitely aids in the application. 
  To finish off my look I top coated my Pinkie an Index nails in my signature sparkling INM Northern Lights, followed by a coat of Cult Nails Wax That, wax finish top coat. To cover some bubbles I got on my Middle and Ring finger I did a light coat of Lynnderella Connect the Dots, followed by Cult Nails Wicked Fast to give the glitter a high shine. 

  I am loving the contrast of  colors in these marbles, and I really love the completed look. I am also loving what CtD did for my bubbly nails. Overall, I am so happy with how this turned out. I don't marble enough for how much I love the look of the technique. And you know what they say, practice makes perfect. I feel my confidence in my marbling grow with each marble mani I do. They are becoming more fun now that I am getting a good grasp. I think I finally feel comfortable about filming a tutorial about the way I marble. 

 How do you feel about watermarbled nails? Also, would you guys be interested in a tutorial? Let me know in the comments ♥. 
(**Press Sample**)
More aboutInglot Spring Pastels 2013- Watermarble Nail Art

LTHP heads over to Nailitmag.com!

(**Press Sample**)
Happy Saturday everyone!! 

  I just wanted to do a quick post to let you guys know that I am over on the Nail It! magazine website with a guest post. I went with a texture theme, since I am slightly obsessed with this trend. I also did a look with some of the shades from the Cult Nails In the Garden Collection, for the ladies who do not like textures at all. I hope you guys like these looks! I had a lot of fun working on these. 
To find out the details behind these Three looks, just head on over to nailitmag.com. You can also read a short interview [HERE].

 I've had a minor setback here (I am also waiting on a middle nail break to grow out)... Ever have something happen to you that makes you feel really old for some reason? So, yesterday.. I was having a coughing fit... and I threw my lower back out  -___-. I mean, REALLY? Who does that? lolol... Who throws their back out from a coughing fit? Anywho, I'm taking it easy and hoping for a speedy recovery because I have lots I want to get done. I am also dying to play with my new Pueen stamping plates!! I have not had a chance to get into those yet, the designs are SO adorable!!

I hope you guys will check out my post for nailitmag.com! Happy Saturday everyone!

(**Press Sample**)
More aboutLTHP heads over to Nailitmag.com!

Updated OCC Power Plant Mani- Matte Angled French Tips

(**Some of the products featured in this post were provided for  review consideration**)
Good Morning!!

  This will be a quickie post. I feel like all I do these days is bitch about not feeling well, and I am really sorry about that. I have this "thing" where I feel like my body cannot keep up with my brain. There is SO much I want to/need to get done. I have so many ideas floating around in my brain, but I rarely have the energy to get up and DO IT. I hate it :(. I really try so hard not to dwell on my illness, but it has been wearing me down lately. I've never had these many bad weeks in a row. I know this is not permanent and I hope to be well someday soon. I will be heading to the Mayo Clinic in May so, Fingers crossed I'll come out with some more definite answers.  
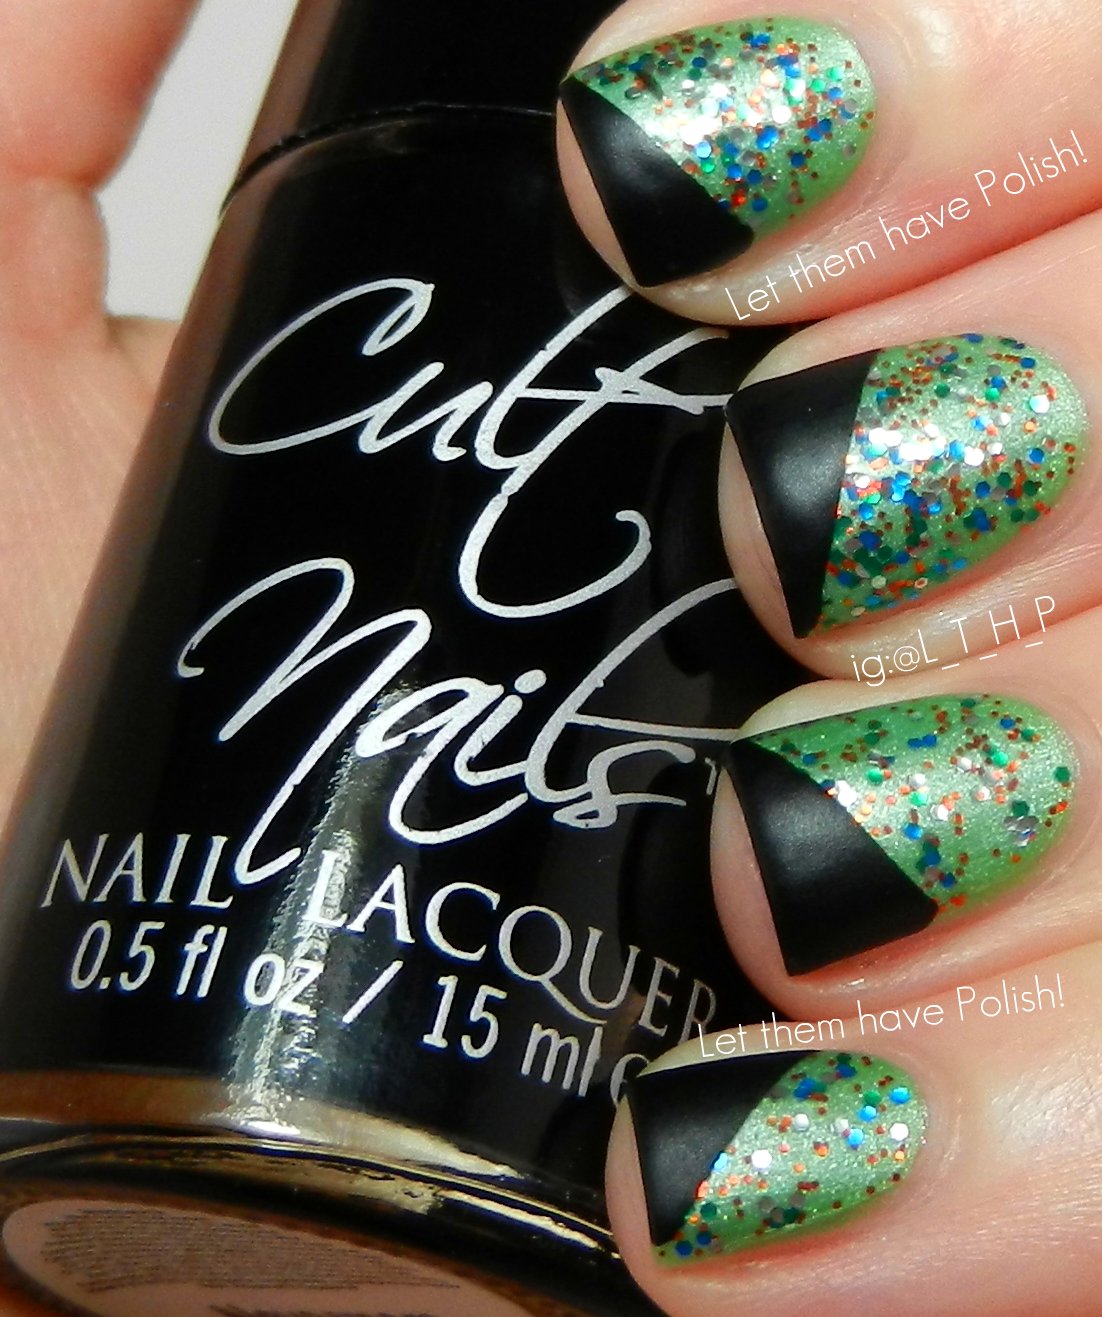
 So this cool and simple look started with a base of OCC Power Plant. After a day of wearing Power Plant by itself I decided to layer Lac Attack's Hogwarts over it for some bling. I wore that for another day or so and I had some minimal tip wear going on, but was not ready to part with my mani yet... SO, I taped off some angled french tips and painted the exposed parts with Cult Nails Nevermore. To finalize my whole look and give it some edge, I added a coat of Twee & Honey This is mateness- matte top coat. 

 I'm hoping to be a little on track this week. I do have quite a lot of pictures ready to go, they are mainly makeup though. I know many of you are here for le nails, but LTHP LOOOOVES makeup too ♥. So, there might be a lot of makeup posts coming your way these coming days. Mainly because I don't have much "nail" material ready to go :(. But as I said above, I have SO many ideas, so many new things I want to try and tutorials I want to film. I just need my body to get with the program and stop rebelling against me.

XO


(**Some of the products featured in this post were provided for  review consideration**)
More aboutUpdated OCC Power Plant Mani- Matte Angled French Tips

Cult Nails Tempest, Fetish & Blaze -Nail Art Look

Happy Friday!!! 

  Today I have a really cool look featuring Cult Nails' Second Year Anniversary Collection. A few days ago I showed you guys Fetish all on it's own, but I thought it would be cool to do a look that featured different finishes. It seemed only fitting that I found a way to combine all Three shades in the collection into a cool look! 
 This look started with Two effortless coats of Tempest. I topped my base off with some Seche Vite and waited for it to dry. Then using some wavy scrapbook scissors I cut some strips of scotch tape to create the wavy side panels using Fetish. To clean up the seam between Fetish and Tempest I used a short striping brush dipped in Blaze. Then I went back with a really small dotting tool and added some Fetish dots along the wavy line. I did not top coat the finalized look to keep the cool contrast between wax and shiny finishes. Plain and simple, I ADORE this look!! And best of all, it was SO easy and fast to do!! 

 Here is a swatch of Tempest. The most flawless, creamiest shade of White I own. Two easy coats and an amazing self-leveling formula make this polish an absolute must have in my book!
 I said it before and I will say it again... I NEED more polishes in that wax finish!! There is something about it that I am absolutely LOVING!! I am also loving Blaze. When I first saw it I thought I would be indifferent towards it and then I actually wore it and I could not stop staring at my nails! It is a beautiful, blingy, yet classy glitter! My thoughts on Tempest? FINALLY, the perfect white creme haha!!! And Fetish? ... Yeah... you need it!

 I'm so ready for the weekend, I'm sure you guys are too :D!  

(**CN products provided for review**)

More aboutCult Nails Tempest, Fetish & Blaze -Nail Art Look

Cult Nails Fetish

It's Thursday, Thursday... 

  I really wish it was Friday, fryday... Today I want to shre the amazing Cult Nails Fetish. This polish was released earlier this year for Cult Nails Second Birthday. Maria did a small release of Three colors and this edgy beauty was one of them. 
 I was so floored when I started seeing sneaks of this wax-finish Black. For the longest time I had been dying for a solid, matte- creme Black. There are a few matte Blacks out there but most have some kind of shimmer, Fetish does not shimmer. But what I really love is that Fetish is BLACK, a lovely opaque Black. I absolutely love the finish on this shade. I was worried that the intensity of the Black would not hold up as the polish dried, but it did. These were some HAWT liquid latex nails! Many matte top coats (when layered over Black) and a few matte "Blacks" will dry to a dark Graphite shade instead of true Black. Fetish is just plain sexy!  
  The best thing about this polish is that fantastic Cult Nails formula we have come to expect. This polish applied very evenly and smoothly. The application of this shade is just like that of Nevermore. If you are in a rush this is an excellent polish because it is practically opaque in one coat... And HELLO that awesome and edgy finish!! It's just so cool that it is not fully matte or fully glossy.. Just perfect! I did Two coats when I wore my Fetish. I was also very impressed with dry time on this shade. It was fully dry and solid in about 30 minutes. I did not top coat this polish because I didn't want to alter the awesome finish it dries to on its own.

  I saw a recent sneak peek of Cult Nails upcoming shades and Maria is planning a Wax- finish Barbie Pink that I am SOOOOO excited about!!! After trying Fetish.... I want a WHOLE line of colors in this finish!! I think a Teal would be AWESOME!!!

What are your thoughts on this Wax finish?

(**CN products provided for review**)


More aboutCult Nails Fetish

Muffin Mon... Er... Tuesday? O.P.I Euro-Marble

Hello lovely people!! 

  So... I'm late with this post :(. Yesterday was not a good day for me. I woke up pretty sick and whatnot so... Needless to say the polishing was not happening. Today I woke up feeling better, but still quite out of it. I'm sorry this post is so late and short. I've really been struggling with my health and energy lately. I would love some consistency right now :-s.
 This look started with a clean White creme base. I did a Blue themed watermarble with some of the new O.P.I Euro-Centrale shades. I used You're such a Budapest, I saw...U saw.. We saw... Warsaw and Can't find my Czechbook. I always foget how much of a pain it it to clean up Blue polish after marbles. Well, for me at least. Once I was done with the cleanup, I was not entirely happy with my marble. So I topped it with my secret weapon, INM Northern Lights. When that didn't save it with for me I did a Konad stamp from plate M63 in Konad Black special polish. I then went back and topped the whole thing off with O.P.I Don't touch my Tutu to give it an "underwater" look. I actually really adore the finished look. I'm glad I stamped and sammiched the whole look.
 
 Muffin is being a princess lately.... And hey!! It's a Truffle photo-bomb!

 Here is the marble before I stamped over it. IDK what it is but I was not really happy with it... :(
That is all for me today. I hope you guys like this mani. I'm so sorry I was late and short. As soon as I am feeling better I will be back up to full speed. In the mean time, if I disappear for a little bit, don't worry! It just means I need a little break and will be back shortly!

(**OPI products provided for my consideration**)

More aboutMuffin Mon... Er... Tuesday? O.P.I Euro-Marble

LTHP FAQ's: Which top coats do I use?

Hi loves!!

 This is a quick post to share an updated version of my Top Coat video. This is probably the most frequently asked question by you guys. About time I made an up-to-date version of this!!


 As always, of you guys have any questions, suggestions etc feel free to leave em in the comments or email me! 

More aboutLTHP FAQ's: Which top coats do I use?

Muffin Monday!! Julie G Dream in Pretty

Hello my lovelies and happy Muffin Monday!! 

  Sorry about today's post being so late. Muffin mad her pick yesterday. Muffin picked like a boss this week. I set up and Mr. LTHP lured her to the room and she made her pick on the first try. She went for an adorable color from the Julie G line by Jesse's Girl called Dream in Pretty

 For some reason I was feeling tropical so this is the look I came up with for Muffin's pretty pick.
 I started with a base of Two easy coats of Dream in Pretty. On my Middle and Ring fingernails I did some Sunset inspired gradients with Julie's Fave and Dream in Pretty. I topped my gradients off with Seche Vite followed by a thin, sparkly coat of INM Northern Lights. For the all the stamps I used a plate I got in a swap with a Dutch friend and Konad Black Special Polish. I do not know the brand of the plate but it was number SdP-71. I then went back and free-handed the Black ground under my Palm trees with Cult Nails Nevermore. I ended up really loving this look... And kinda wishing I was on a beach with a Corona in my hand...

 Here is a look at Muffin's pick, and my base color, Dream in Pretty. This is one of those pretty Lilac- Pink creme shades that I cannot get enough of. The formula on this shade was SO amazing. It has just the right amount of pigmentation and it is very self-leveling. I used Two coats for full opacity.
 The Julie G line by Jesse's Girl recently had an expansion of 27 colors and I kinda wish I had access to them.. Silly Florida not having Rite Aids :(... BUT, I keep hearing that the more we request on Ulta's FB that they carry Jesse's Girl the sooner they might do so!! So lets all go over to the Ulta FB page and ask for Jesse's Girl cosmetics at their stores!

Thanks for stopping by!!

(**Julie G nail color provided for my consideration**)

More aboutMuffin Monday!! Julie G Dream in Pretty

Muffin Monday!! Pretty & Polished Tomboyish

Oh My!! 

  Yes, you are seeing correct! Muffin is back!! I don't even remember how it has been since I last did a Muffin Monday, even Muffin forgot what it was all about lol. For those of you who may be newer to LTHP Muffin Mondays are a feature that I started back in 2010 and I used to do it EVERY Monday. Basically I would like up random polishes and which ever shade Muffin "picked" I would feature in one way or another.  As I started to get busier and busier it because harder to keep up with the weekly Muffin Mondays. That said, so many of you lovelies reached out to me asking where Muffin was, I had to bring it back!!
  For today's feature miss Muffin picked me one of my new Pretty and Polished acquisitions, and one of the coolest polishes I've played with in a long time! 
 To see Muffin's pick in action just continue reading ♥.


 Muffin picked me the great Tomboyish by Pretty & Polished. This amazing shade of smokey Teal changes colors, drastically, with warm and cold temperatures. I had played with color changing polishes before but none with a change as noticeable and awesome as Tomboyish. In the picture below you see Tomboyish in it's "cold/natural"state. I really love this beautiful shade of smokey Teal creme and all the pretty shimmer suspended in the base. 
 This look is inspired by the name of the polish, in a backwards sort of way. I wanted to give Tomboyish a very delicate and girly look. For the lacey stamps on my Index and Pinkie fingernail I used Cheeky plate CH23. For the bow stamp on mr Ring fingernail I used Konad plate M59. To accent my stamps I used some small pearls set into my top coat. On my middle finger I did an accent of Lynnderella Connect the Dots.

 In the photo below I have dipped my fingertips in warm water to get the color shift. Tomboyish goes from a deep, smokey Teal to an ethereal, shimmering Green-ish- White. I kept switching the water from cold to warm to see the nail art pop and "disappear" with the color changes of the base.

 And here you can see Tomboyish before any nail art was added. This beauty has a fantastic formula and I only needed Two coats for full opacity.

 This pretty does dry a bit dull and gritty so a top coat is a must to bring out shine and smooth out the surface. Other than that, I am so very impressed with every aspect of this awesome nail color.
 What are your thoughts on color changing polish? Do you own any? You can color me impressed with this beauty. I'm thinking that I might need to head to P&P's shop and pick out a few more of these fun pretties!

 Are you happy Muffin is back?!

More aboutMuffin Monday!! Pretty & Polished Tomboyish

Random Sunday Spam and an Update on YouTube!

Spam! 

  It's what's for breakfast!
To see some spamalama just continue reading ♥.

 Also here is a quick You Tube update!!
   In true spam style. I will not be very chatty today. These are all fantastic colors with great formulas. As always if you have any specific questions, feel free to ask via comments or email and what not :D. 

Cult Nails Annalicious

Cult Nails Two Timerb over Julie G Royal Rebel

Pomegranate Lacquers in Midnight Satellite

LVX Nail Color in Legendaire

LVX Nail Color in Sanguine

LVX Nail Color in Prussian

Sation Strummin' my Nails

Sation Holiday Golightly
Thanks for stopping by today loves!!!

(**Some products provided for review**)

More aboutRandom Sunday Spam and an Update on YouTube!

Check It Out

This is a look I wore last week. I'm not sure what you could call it, chevron/gradient/ombre accent nail?
The polishes I used were:
Thumb - China Glaze Something Sweet
Index - China Glaze Dance Baby
Middle - Cult Nails Devious Nature
Pinky - China Glaze Traffic Jam
Ring - freehand crooked lines of all the above polishes plus Sinful Colors Snow Me White


More aboutCheck It Out

X-Mas Rush!!! Snowy Holiday Gradients

Good morning my lovelies!! 

 Today's look really captured my heart. When I saw this in my head, it was not nearly this pretty. Don't you love when that happens? I wanted to do something very snowy and subtle, yet eye-catching. I also really wanted to use some of the adorable "Holiday-ish" stamps I'd never used before. So I settled on snowy gradients with pretty snowflake stamps. The matte top coat was and afterthought, and as it turns out, the perfect finishing touch for the effect I wanted to achieve. 
  This look started with a clean White creme base of Zoya Purity. Once my base was dry I started working on my gradients. For the Green to White gradients I used Zoya Shawn and O.P.I Don't touch my Tutu. For the Red to White Gradients I used Zoya Rehka and O.P.I Don't touch my Tutu.  
  Sponging with a creme and a jelly made the gradients blend beautifully, flawlessly and very easily! It also made the clean-up fairly quicker because Don't touch my Tutu is a sheer White jelly so it came off my cuticles and skin with no problem. I really like the look created where the White jelly met the Creme polishes. The Red to White gradients required more build-up as Rehka went a little Pink when layered over the White creme base. 
  To really smooth out the gradients and give them a snowy effect I did a layer of Cult Nails Doppelganger. I was so tempted to stop there and just leave the gradients, but I really wanted to stamp. For the snowflake stamps I used Bundle Monster plate BM323. The Silver snowflakes were done with Sally Hansen Silver Sweep and the Gold with China Glaze Passion. I then top coated with Seche Vite and placed some "glequin" accents on the flakes. I finished the whole look off with a coat of Twee & Honey's This is Matteness- matte top coat to give the finished mani a frosted glass kind of look.
 That does it for today's look! I hope you guys like my frosty gradients :D. I am so relieved that I finally have all the shopping done!!! Yay!!! Now I can really focus on cranking out some awesome Holiday looks!!!

What do you guys think?

More aboutX-Mas Rush!!! Snowy Holiday Gradients