Showing posts with label Multi-Color. Show all posts

Pink-ish Wednesday! Ombre Fun with Inglot Colour Play Nail Polishes

(**Inglot Press Samples**)
Happy Humpday!!

 It's only been about an Eon since I've done a Pink Wednesday... So, here is a Pink Wednesday post ♥. A few weeks back I received the Inglot  Colour Play pastel range. These babies are perfect for ombre manis, they really take the guess work out of picking your shades. For this look, I also went back to my roots by doing some stamping. I used my Pueen Love Elements nail stamping plate set.
Inglot Ombre Stamped with Pueen photo DSCN5568_zps002535d4.jpg
 This look features Inglot Shades, from Thumb to Pinkie: 388, 387, 386, 385 and 384. For the stamping I used Konad Black Special polish and Pueen stamping plates Pueen 32 on my Middle and Ring finger and Thumb. For my Pinkie and Index nails I used Pueen 28. To finish my nails off I did a coat of Seche Vite followed by a light coat of IN Northern Lights. 

 Here are my base colors before stamping and top coating. 388 is a clean, light Lilac purple creme. 387 is an aweome Blue toned bubblegum Pink creme. 386 is a muted Violet- Mauve creme. 385 is a light Pink- toned Mauve creme. 384 is a beautiful muted Coral creme. All of these polishes have a slight flash of smooth complimenting shimmer. You can see the Golden shimmer in the bottle photo above. That said, the shimmer does not really translate to the nails, but it does aid in appication. All of these were really easy to apply and all did well in Three, thin and easy coats.  
Inglot Ombre photo DSCN5542_zps316d620a.jpg
 I miss stamping so much. But at the same time, I'm pretty excited because I have all of these awesome Pueen plates that I have not really gotten to play with yet. So I have those to look forward to :D. I have been terrible about keeping up with plates honestly, if you guys know of any sets I may have missed out on, or new brands, share them in the comments!! 

 So, I am LOOOVING these Inglot Colour Play range. I love them so much, they have even earned a spot on my wall racks. These are great for nail art of all kinds and I just love the formulas and beautiful shades.

Thanks for stopping by darlings! 
More aboutPink-ish Wednesday! Ombre Fun with Inglot Colour Play Nail Polishes

Summer Ready Swatch Spam!

(**Press Sample**)
Hello my loves! 

  Today I have some swatch-y spam for you guys. I've had these pics sitting in my folders for some time now.... So I figured, why not do a spam post?
Summer Swatch Spam photo FridaySpam_zps91f66cc1.jpg
 These shades are all kinda screaming Summer to me. What are some of your favorite Summer shades? Or do you not really follow seasonal colors? Me, I kinda wear what I want, when I want. But I do tend to gravitate to Spring and Summer shades because they are always so bright and happy. 
 All of these swatches are shown with a top coat. 

LVX Nail Color in Mynt
LVX Mynt photo DSCN5978_zps1782230b.jpg
 Mynt by LVX is a lovely, clean Mint creme. I found the formula on this shade to be AMAZING. Normally, these types of Pastel-ish, minty greens can be a pain in the butt to apply. That was not the case with this beauty. I did Three easy coats of Mynt for my swatch. 

LVX Nail Color in Deco
LVX Deco photo DSCN5940_zps747e371d.jpg
 Deco is an amazing shade of Melon-y Coral creme. I knew I would love this shade the second I unpacked it! I am a sucker for these types of colors. This shade is insanely flattering and easy to wear. I used Three thin and easy coats of Deco for my swatch. 

Zoya Gaia
Zoya Gaia photo DSCN5881_zps4a59189f.jpg
 Gaia, Gaia, Gaia... This color.. Ok.. So this color is BEAUTIFUL, stunning really... A Pearly, shimmering White with the most perfect Golden shimmer running though it. Bridal perfection... That said, this color has a horrid formula! I found it to be patchy and uneven.. I needed Four thin coats to get it to look even and opaque. Maybe layering it could remedy that problem, but it could also ruin that squishy effect... I suppose the color payoff is definitely worth the work I put into the application though. 

Essie Tart Deco
Essie Tart Deco photo DSCN5498_zpsaa6841cb.jpg
 Tart Deco is a vivid, hot Melon-Coral shade. This shade is a more vibrant cousin to LVX Deco. The formula on this color is a little patchy, but not problematic. I used Three thin coats for my swatch. 

Zoya Sari
Zoya Sari photo DSCN5471_zps6d38146a.jpg
 Sari is a lovely, nude Pink jelly. Colors like these are great for French manis, or just to add a healthy glow to a nakey-look. I used Three thin coats for my swatch. 

LVX Nail Color in Indigo Bleu
LVX Indigo Bleu photo DSCN4846_zps39a2df1e.jpg
 Indigo Bleu is a deep Violet-Blue creme. This shade is intenesely pigmented and very easy to apply. I could have almost done with one coat. I used Two thin coats for my swatch. 

Zoya Josie and Zoya Destiny
Zoya Josie and Destiny photo DSCN4905_zps9f33f6f8.jpg
 Zoya Josie is a beautiful Grass Green creme that applies like a dream. I used Two easy coats of Josie. For this look I did an accent in Zoya PixieDust in Destiny. Destiny is a hot Coral texture laced with strong Golden shimmer. I used Three thin coats of Destiny. 

  Any faves in this bunch? I am really in love with Gaia. I hate the formula on that color, but my gosh it is just beautiful! I also really loved Mynt and Deco by LVX. Though I must admit, this Summer has turned into the "Summer of the Textures" for me. I've been wearing Textures non-stop since they all started coming out! 

 What have you been wearing lately?

More aboutSummer Ready Swatch Spam!

KBShimmer Totally Tubular Inspired Nail Art

(**Press Samples**)
Hello everyone and happy Thursday! 

  Today I have a crazy busy manicure haha! I'm kind of calling this my "kitchen sink mani". I just couldn't stop doing things to my nails. The whole idea originated from my bottle of KBShimmer's Totally Tubular. I kept swirling it in my hands and being hypnotized by the amazing blend of colors and shapes. And so this mani was born, inspired by the beautiful colors in Totally Tubular. I will be sharing swatches of KBShimmer's full Summer collection very soon! 
KBShimmer and Bettina photo DSCN6090_zps03c78e5e.jpg
 On my middle nail is Totally Tubular by KBShimmer. I will be reviewing the polish itself soon. For now, I really want to focus on this colorful nail art that got me through my days at the Mayo Clinic.
  So, as I mentioned above, the nail art itself was inspired by the colors in Totally Tubular. I loved the mix of Teals, Magentas and Blues. So, on all my nails but my middle nail I did a White base of Cult Nails Tempest. For my water marbled nails I used Bettina Aqua, Pink Bikini and Premium Wash. I then topped off my marbled nails with O.P.I Polka.com.
 For my gradient nails I used Bettina Picnic, Sparkle and Glitter Jean. I topped off my gradient nails in Aphrodite Lacquers V.I.P Room. I finished off the entire manicure by topping all of my nails off with some KBShimmer Clearly on Top and then some INM Northern Lights sparkle top coat.

 I CANNOT believe I forgot to take pics of my thumbs! I really loved how the marble pattern turned out on them. I had never been able to get a full flower design on my nails before! So, I'm so sorry, but here are some crappy cell pics of my thumb marbles. I think they were about Four days old at this point. 
 photo 135f4825-398b-409f-802c-a7e181cf6cac_zpsb0533691.jpg
 I loved wearing these nails. My days at the Mayo Clinic were really intensive, exhausting and not entirely successful.. But my nails were looking FIERCE the whole time. I got so many compliments from  people while I was there. It was nice to have the distraction of my colorful nails and hair while I was going through all that stuff. 

  Oh and some cool stuff happened right before the Mayo trip. I got to meet the awesome Kelly of vampyvarnish.com!! It was an awesome lunch meeting with my Florida beauties and Kelly. Thank you Courtney for the lovely photo!! From L to R: Steph of Imperfectly Painted, myself (goodness I need to do my roots soon!!), Maria of Cult Nails, Kelly of Vampy Varnish, Kari of Once Bitten and Courtney of Phyrra. 
Thank you all for stopping by today!! If you have any questions about Mayo, feel free to ask in the comments, I will try my best to answer them. I just didn't want to get into all that in the post itself. 

XO!
More aboutKBShimmer Totally Tubular Inspired Nail Art

Inglot Spring Pastels 2013- Watermarble Nail Art

(**Press Sample**)
Happy Humpday!! 

  I am at such a loss of words today :-S. So much has happened over the last few days that I don't even know where to start. There has been some utter, horrid nonsense going on; Muffin's been sick, I've been sick, husband got laid off.. It was hectic for a few weeks, but hings are settling down now. 
  Among all the madness some really awesome things happened too. If you pick you the latest issue of Nail It! magazine, you will see a picture of a manicure by yours truly featured in the Snapshots section. It is SO cool to see my nails and name on an actual magazine! That had been one of my goals for some time now.
 Anywho, these are my very first Inglot polishes, and I can honestly say I am a fan. They released a range of 10 pastel shades for Spring 2013 Ranging from Yellow-toned Peach, to Aqua Blue; these colors were begging to be played with. I immediately knew I wanted to do a marble-skittle of sorts with these. These Inglot polishes have a great formula for watermarbles, great pigmentation a really good spread in the water. 
 photo DSCN5480_zpsabb72828.jpg
 For this look I started with a White base done with Cult Nails Tempest. For the Pinkie and Index marbles I used Inglot 381(Orange toned peach), 390(Vivid Mint Pastel) and 383(Orange toned Coral). For my Ring and Middle nail I used 382(Yellow toned Peach), 387(Soft Lavender-Pink) and 389(Aqua Blue). All of these Inglot polishes have a creamy formula. I'm not sure if it was just me, but I was detecting the slightest hint of shimmer, so barely there it is not really worth mentioning. I think it definitely aids in the application. 
  To finish off my look I top coated my Pinkie an Index nails in my signature sparkling INM Northern Lights, followed by a coat of Cult Nails Wax That, wax finish top coat. To cover some bubbles I got on my Middle and Ring finger I did a light coat of Lynnderella Connect the Dots, followed by Cult Nails Wicked Fast to give the glitter a high shine. 

  I am loving the contrast of  colors in these marbles, and I really love the completed look. I am also loving what CtD did for my bubbly nails. Overall, I am so happy with how this turned out. I don't marble enough for how much I love the look of the technique. And you know what they say, practice makes perfect. I feel my confidence in my marbling grow with each marble mani I do. They are becoming more fun now that I am getting a good grasp. I think I finally feel comfortable about filming a tutorial about the way I marble. 

 How do you feel about watermarbled nails? Also, would you guys be interested in a tutorial? Let me know in the comments ♥. 
(**Press Sample**)
More aboutInglot Spring Pastels 2013- Watermarble Nail Art

China Glaze Textured Skittles with In the Rough, Bump & Grind and Of Coarse!

(**Press Sample**)
Good morning and happy Wednesday! 

  Today I have a, sort of, skittle look with Three of the new China Glaze Texture polishes. When I was organizing my desk last weekend, these Three colors ended up together. I loved how they looked together so much that I went with a "middle-nail-accent-thing." I got many compliments on this mani. The colors are very fun, bright and Summery. 
One and a half hours after application
The polishes I am wearing are In the Rough, Bump & Grind and Of Coarse!. In the Rough is a Chartreuse creme with a textured finish. None of these sparkle. They all dry to a slightly rubbery finish with a concrete-like texture. This was the sheerest of the shades and needed Three coats, wait in between coats. These apply best in a slow steady manner. Let the brush do the work and don't apply pressure so that the textured bits apply evenly. Bump and Grind is a bright Raspberry creme texture. This shade is really bright  and saturated with color. I could have almost gotten away with one coat of this rich shade. I used Two coats. Of Coarse is a bright, pool liner Blue, creme texture. The formula on this shade is also ridiculously saturated, I used Two coats. These dried fairly fast, no slower or faster than any of the other textures to have come out so far.
Shady to show texture better
 Now... The wear on these disappointing. The Chartreuse shade, In the Rough, chipped within the same day of application. Bump & Grind chipped on the Second day. Of Coarse, the Blue shade was wearing OK. I'm really not sure why these wore so poorly on me. All of the other textured polishes I have tried have worn like iron on me!
 Also, someone mentioned that these Three particular shades are slightly reminiscent of Zoya's Mod Mattes in terms on the colors (Lolly, Phoebe & Mitzi), and they are... If you enjoyed those Three shades, and the matte finish, you might like these. I want to give these another shot, I'm hoping for better wear next time around, because I like the shades. I also like the concrete like finish. I know this is one of those "love it or leave it" type of finishes, but I really dig it.
45 min. after application
 I also have some exciting news! I had the honor of being interviewed for the Nail It! magazine website. I am so excited and so grateful to have this great opportunity! It is crazy to go to the home page of a magazine and seeing my face there! WHAT?!!

Have you given the China Glaze Texture polishes a go? How was the wear for you? I'm curious to see if it was, hopefully, a fluke :-S. Let me know in the comments how it went for you if you tried these out! 

(**Press Sample**)


More aboutChina Glaze Textured Skittles with In the Rough, Bump & Grind and Of Coarse!

Zoya Summer PixiDusts and Stunning Collection- Skittle Ruffian Nail Art

(**Press Sample**)
Hello and happy humpday! 

  Today I have, yet another, skittle mani to share with you guys. This look features Five of the new Zoya Summer PixiDust polishes as well as Four of the new Summer Stunning collection cremes. When I was sitting down to do my swatches of the Summer PixiDust polishes, I could not decide where to start. So I decided not to start at all... And wear them in a mixed texture look instead. These colors are just too fun and too beautiful and I could not resist playing with them. 
 This look started with all creamy bases. From thumb to Pinkie: Julie (from the Spring collection), Yana, Rocky, Thandie and Darcy. Then I decided to do PixiDust ruffians over my Skittle base. I wanted to do monochromatic skittles, with mixed textures. These colors were PERFECT for the look I had in mind since Zoya released shades which all complemented each other.
 For the ruffians I used (from thumb to pinkie): Stevie, Miranda, Liberty, Beatrix and Solange. I did Two thin ruffian coats over my creamy bases. I wore this manicure for about Five days? IDK, it was a LONG time in LTHP time, I could not believe how well they held up. These Summer PixiDusts have amazing formulas, much like their Spring "ancestors" lol. There is a mix of Foily texture and the Original PixiDust look as well. If you enjoyed the first PixiDust set, you will LOVE and ADORE this new Summer PixiDust collection.

 Here are some shots of my base colors. The new Summer cremes all had fantastic formulas and all did well in Three thin coats. Yana (index), Thandie(Orange) and Darcy(yellow) had a very slight shimmer to them, barely there, but really pretty. These are really vibrant, fun and perfect for Summer.
 What are your thoughts on mixed texture manis? I really enjoy them and make for quick and cute nail art. I can't rave enough about the Zoya PixiDusts, they are just beautiful, and I love the vibrant colors and how much they sparkle. The Summer cremes are adorable and fun. Zoya always has my heart when it comes to Summer colors. 

Skittle all the nails!!! 

(**Press Sample**)

More aboutZoya Summer PixiDusts and Stunning Collection- Skittle Ruffian Nail Art

Sation Candylandia Gradient Nail Art and an Update

(**Press Sample**)
Good afternoon everyone!! 

  Last night I took a little poll on the Facebook page to see what you guys were interested in seeing today. Out of all the options you guys voted for "a gradient", so a gradient it is :D! Many of you also suggested a Textured gradient, that will DEFINITELY be happening soon! Today's gradient features some lovely, awesome shades from Sation's Candylandia collection. For this gradient I was inspired by [THIS PAIR] of Black Milk Clothing leggings.
  Before I go onto the nail art I wanted to give you guys a little update on my visit to The Mayo Clinic in Jacksonville, FL. Not much happened as this was an initial consult visit. I did get scheduled to go back in June for about Four days of tests. It is going to be a long process, but I finally feel like I am at the right place, with the best doctors. I have not felt hopeful in a long time, this visit changed that for me.      
  The doctor who consulted with me was like no doctor I've ever spoken with before. He really inspired a lot of confidence in me and was very kind. He actually listened to what I had to say and showed legit concern. This is not something I want to be going through, but I am glad I am finally being treated by a great team of doctors at an amazing facility. 
  Now for a miss Muffin update: my poor kitty has a cold! But worry not, she has been to the Vet. She was given a shot of slow-release antibiotics. She is acting fine and active, eating etc, but I didn't want to bug her over the weekend as I could tell she felt "off". How 'bout that gradient!!? 
 This look started with a base of Sation's Love is in the Heir, which is a light, Greyed out Blue crelly. Using this shade as my base color mae all the difference when it came to building up my gradient. The light Blue tone really brought out the colors I was using to gradient over my light Blue shade. For the gradient I used colors from Sation's Candylandia collection. I went with Plenty of Frogs, Cast a Spill on You and Super Nail-tural Powers. I.LOVE.THIS.GRADIENT!!! I loved it SO much I didn't even do my signature coat of INM Northern lights!! WHAT?!! LTHP didn't put Northern Lights on a gradient?!!!!!! I know, I know haha... But just look at that shimmer from Cast a Spill on You(Blue) and Plenty of Frogs! 
 This was probably the easiest gradient I've ever done and I chuck that up to combination the base color and the formula of the shades I used to gradient. The shimmers really made the seams blend effortlessly and created such beautiful airbrushed-looking surfaces. Choosing the correct base color for gradients really does make a difference and I am just now learning this myself. I should film a tutorial on how I do my gradients, huh? I know everyone has their own way of doing them, and you guys have been asking for a while... I've just been a horrid Youtuber :(.

 Here is a shot of my base color Love is in the Heir. This shade comes from Sation's Marie Antoinette inspired collection. This shade is a soft, muted Blue with some slight Grey undertones and a subtle twinkling Silver sparkle. Finish-wise it is between a creme and a jelly, more jelly than creme. The formula was smooth, even and easy to work with. I used Three thin coats since I wanted to show you guys a swatch of this shade as well. Girls with longer nails, or those of you who are not a fan of "visible nail line (VNL)" might need a few more coats for full coverage. I really enjoy soft, dreamy shades like this one. Do you?
 I am SO sorry about the hiatus over the past week. I'm hoping to break that cycle of absences for a while. I have SO much nail polish to go through. I also got some new stamping plates, the Pueen sets! I had not gotten new stamping plates in like a year or so! I am SO excited about these Pueen plates though, they are ADORABLE!

 And just a quick reminder that Google reader will be going away on July 1st! I've set up shop over at Bloglovin. I just LOVE how easy it is to use and they also have an iPhone/Droid app! Make sure you are following LTHP on Bloglovin so you don't miss out!! Also, [HERE] is a full list on ways to keep up with the Let them have Polish! nonsese!
Follow on Bloglovin

 I've really missed you guys so very much! I hope you guys liked this gradient! I kinda wanted to eat my nails when I wore it :)!

(**Press Sample**)
More aboutSation Candylandia Gradient Nail Art and an Update

Hard Candy- Candy Sprinkles Skittle Nails

(**Press Sample**)
Good afternoon! 

  Today I have a sweet skittle mani I did using some of my new Hard Candy nail polish shades. These are all from the Candy Sprinkles collection. As you can see, these cuties are heavily inspired by the "glitter sammich" concept. This group is made up of Nine creamy-glitter polishes. Today I am sharing a cute skittle mani with Five of these pretties. 
From thumb to Pinkie:
Gummy Green: A creamy-jelly, muted Mint-colored base, with Silver and Black small hexagonal glitter. This particular shade had one of the better formulas. I used Three thin coats for full coverage and to get a really good "mint-chip ice cream" effect going on.
Pixie Pink: A creamy-jelly, light milky Blue-Based Pink. The small hexagonal glitters in this one are Teal, Silver and Pink. I used Three thin coats. The formula on this shade was nice and easy to work with.
Sweet Tooth: A jelly, almost White pink packed with Blue, Pink and Silver glitter. This was the most sheer of all the colors I tried. I used Three decent coats but the formula was great and easy to work with.
Jelly Bean Blue: A creamy base, Powdery Blue packed with Blue and Black glitter. I found the  formula on this shade to be patchy and a little problematic. A light and patient hand is key with shades like this one. I used Three coats.
Sugar Rush: A white creamy base packed full of Black and Silver glitter. I had the same formula issues with this shade as I did with Jelly Bean Blue. Three coats as well.
 Below are some macros of these yummy looking polishes.
 Even though the formulas are kind of.. all over the place... I really am not bothered by that and really ended up loving these polishes. I'm glad that an affordable polish line came out with these "speckled/ sprinkled" polishes. These all seemed to even out well at Three coats and they all wore really well. I think I had these on for about Four days, no chips, no shirnkage. Before application it is best to give these polishes a good shake, they like to settle a bit. These babies to require a good top coat to bring out the shine and smooth the surface. I used Two coats of KBShimmer Clearly on Top top coat and I had absolutely ZERO shrinkage (YAYAYAYAY Praise the polish gods).

Have you tried any of these new Hard Candy polishes? They are available at Wal-Mart and Online as well. For the price, these are adorable little polishes and I really love what hard Candy did with the glitter-sammich looks. I like all of these quite a lot ♥. 

Any faves?

(**Press Samples**)


More aboutHard Candy- Candy Sprinkles Skittle Nails

Milani Textured Polish Skittles

Happy Humpday!! 

  A quick update on my whereabouts.... It has been a few bad days for me. I was in the hospital again on Monday after a few days of feeling "off". I was just at the doctors again today and there are a few tests they want to run on me before moving forward with new medications. It has been a rough few weeks for me and I'm finding myself feeling more and more run-down by the day. It kinda sucks pretty hard. I miss getting into my grooves and swatching and arting like a crazy person. 
 So now that you guys are all caught up on the icky stuff, how bout some AWESOME nail polishes? By now I'm sure you guys have seen a few posts featuring these awesome new textured polishes by Milani. I will admit that I was not on board with this textured trend until I tried these! I love the vivid shades and the texture is actually really cool and not as distracting as I thought it would be. 
 I decided to do skittles with my textured polishes because all the colors were so awesome I couldn't pick just one. The ony one not shown is Shady Gray, which is a really chich shade of Concrete Grey. For this skittle look I used (from Thumb to Pinkie): 
Tainted in Red: A bright, neon Red creme with added texture. This shade could have been a one coater. 
Yellow Mark: This shade is an uber saturated shade of Yellow creme with the added texture. This shade had, by far, the most saturated formula. Could have definitely been one coat. 
Aqua Splash: A beautiful shade of vivid, light Teal creme  with added texture. This shade is a little sheer as it goes on but it dries slightly darker that it applies. I used Two easy coats. 
Purple Streak: A true, grape Purple creme with added texture. This shade was slightly patchy in application, but not problematic. I used Two coats. 
Spoiled in Fuchsia: This shade is a bright shade of Fuchsia creme with the added texture. This shade also had a very saturated formula. 

 I was SO impressed with the formula on all of these. They all applied so easily. Most of these also have really saturated formulas that could almost be one coat. I used Two coats for all of my swatches. In the photo above I had waited about 20 minutes before photographing. As you can see there is still a bit of shine but at that point they were pretty much dry and good to go. All in all they took about an hour to reach that neat matte look but they were good to go in about 20 minutes. 
 In the instagram photo below I had already been wearing the polishes for over 24 hours and the texture had fully dried and set. The look of these is SOOO neat!! These do not sparkle at all, they have an almost concrete/ leathery look once they are fully dry. 
  These polishes wore like IRON on me. As a matter of fact I am still wearing remains today, Five days later. I am very impressed with every single aspect of these polishes and seriously LOVE them. 
These pretties are available online but will also be in stores soon!! I really can't wait to try my hand at some nail art looks with these as well as that awesome Grey texture!! Do you have any favorites in this bunch? I seriously cannot pick!! I love them all SO much. I had not been this excited about a nail polish innovation since back when Holos came out!

 As of right now I am not sure when I will be posting again. Worry not!! This is not a hiatus or anything!! Along with all the doctors visits and what not I'm also having some work done to my computer, stuff that is really overdue, so that will put me out for a few days (but hopefully not DAYS). 

  But, I know you guys understand that health really does come first. ANNNNDD the sooner I am better and stable the sooner I can get back to producing awesome content for you guys (and myself :). Love you and miss you guys very much!! Your support means SO much to me!

(**Milani products provided for my consideration**)

More aboutMilani Textured Polish Skittles

Etsy Mania! Aphrodite Lacquers Peacock Earrings and VIP Room

Good morning my lovelies!! 

 Today I have a couple of swatches of some beautiful layering glitters by Aphrodite Lacquers. I really love Aphrodite Lacquers creations. They are all very unique but in terms of collections they are very cohesive. I also love that many of her creations do not require undie colors. These two glitters I'm showing today are meant for layering but they are AMAZING!

Aphrodite Lacquers in Peacock Earrings over Color Club Port-folio
 This combo was pretty much meant to be!! Peacok Earrings is a great blend of Black and Satiny White Squares in varying sizes. There are also small Teal and Silver prismatic hexes suspended in a micro shimmery base. This is just an awesome, fun layering polish. I really like the interesting mix of shapes and colors in this pretty.

Aphrodite Lacuqers VIP Room over Nicole by O.P.I Feeling Grape-ful
  VIP Room is a beautiful mix of opalescent squares and micro opalescent shimmer. This polish is just beautiful, ethereal, angelic? I layered it over many colors, but when I saw it over this medium Purple, I knew this was the combo I would show you guys.
 That will do it for today :D. My nails are finally evened out so I can start swatching again and finally start doing tutorials!! I am SO ready and excited to get going with tutorials for you guys. 

 Don't forget to check out Aphrodite Lacquers shop!! 

(**Some products provided for review**)


More aboutEtsy Mania! Aphrodite Lacquers Peacock Earrings and VIP Room

Sunday Spam! International Edition

Been a while right?

  So today is supposed to be a challenge day but all Three of us are out of it lol. We will be back on Tuesday or at some point next week, we will definitely get back into it soon! I've had these swatches stashed away for EVER so I thought it was time to post them. All these polishes came from The Netherlands. Well all but one, which came from England. 
To see some Sunday spam continue reading!

Catrice Dirty Berry

 Dirty Berry is a beautiful dusty shade of light Lavender Purple with subtle holo lavender/holo shimmer. This polish has a fantastic, two-coat formula. This is a really popular polish and I understood why the second I put it on. This is BEAUTIFUL!!

Mavala Electric Green
 This is such an unique and beautiful shade. Electric Green is exactly that! A crazy bright, lime green with strong glowing Green shimmer. I don't have anything else like this polish in my collection. This polish has a great Two coat formula. I also love the bottle. It reminds me of old school polish bottles.

Essence Gold Fever over Nicole by O.P.I Mer-Maid for Each other (with matte top coat)
Gold Fever is a blend of micro Gold glitter accented by slightly larger Red particles. I really loved this combination and the texture of the finished matte mani.

MaxFactor Moon Dust over Zoya Monica
 Moon Dust is a dense color shifting topper. It's pretty cool, there is a dustiness to it that gives it a cool texture. This polish came from England.

Essence A Lovely Secret
 A Lovely Secret is a really pretty shade of Lilac Purple with this interesting Purple shimmer/texture and then a micro magenta flash that is barely there. I can't really describe it. I absolutely love this shade and it has a great formula. I used Two coats.

Essence Glamorous Life over Zoya Rehka
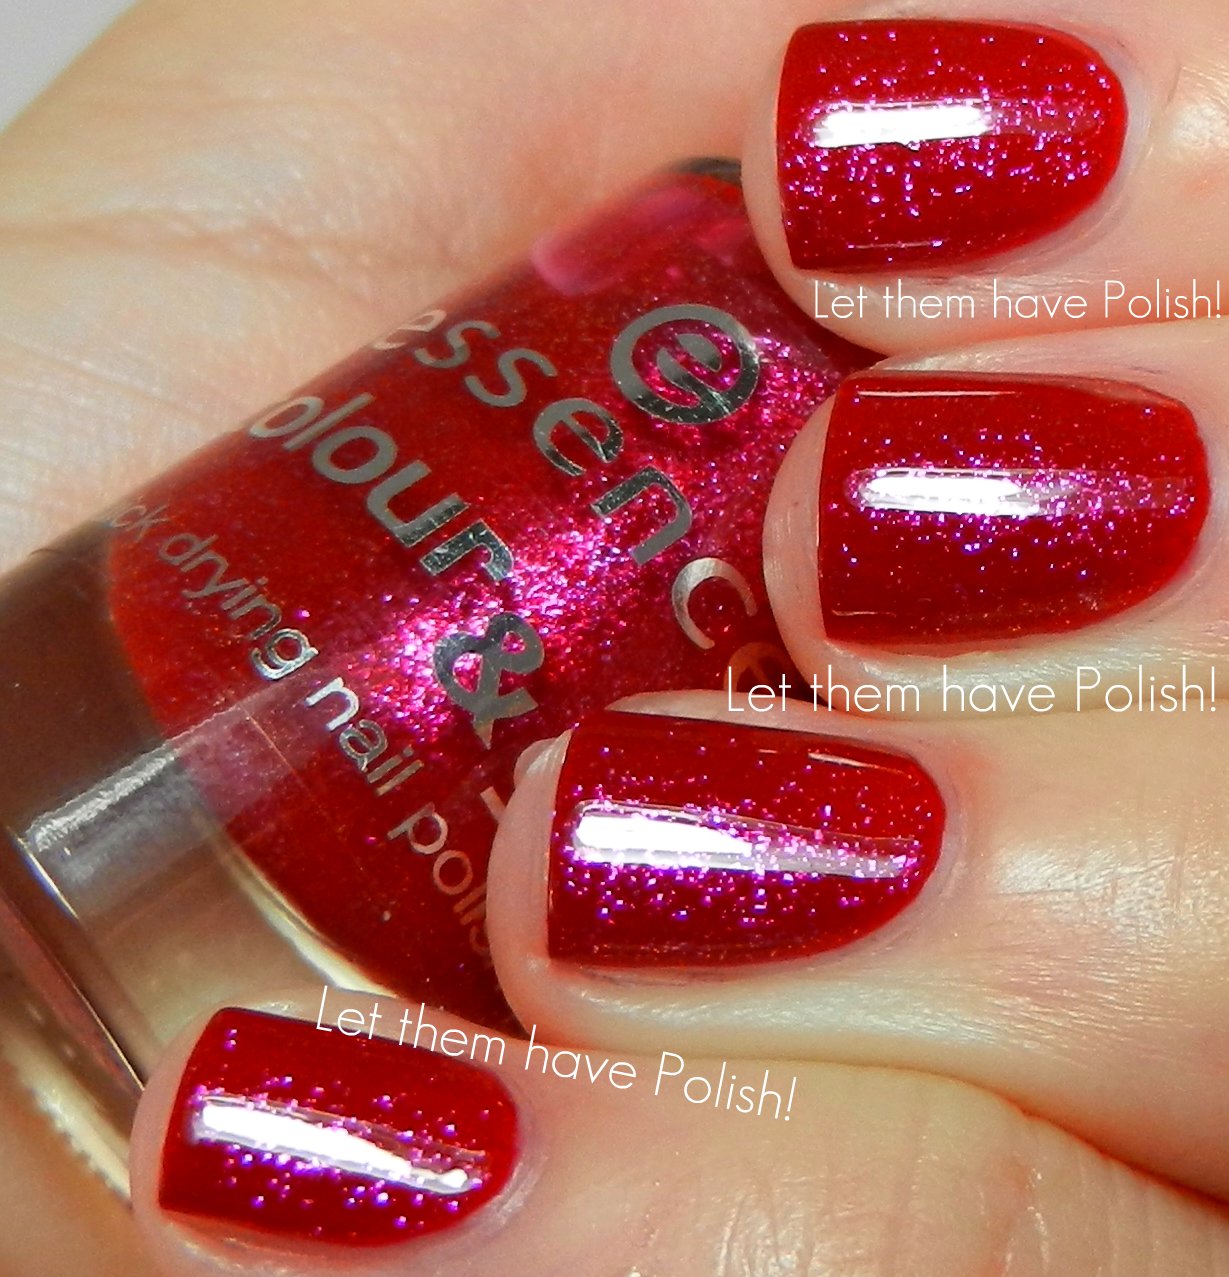
Glamorous LIfe is an awesome Berry based shimmer with great Pink flashes. When I wore it I decided to layer it over Zoya's Rehka to light up my Red base.

Essence I Want That!
 I Want That! is a great, girly shade of Pink with a subtle Pink shimmer in the creamy base. This shade has a great Two coat formula.

BeYu #147
 #147 didn't photograph quite right. This is one of those vivid neon Teal/Green/Blues. You guys know what I'm talking about right? Well anyways, this is a great shade and it has a great formula. It also make great underwear for Floam.

Thanks for stopping by for this Sunday Spam. I should have my challenge nails up tomorrow and be back on track by Tuesday. Thank you to Sharon and Joan for sending me these pretties!

More aboutSunday Spam! International Edition