Showing posts with label floral. Show all posts

Beautopia Nails Floral Copy Cat

Inspired by Beautopia nails on Tumblr. More floral nails.
I really loved these and ended wearing them for 4 days last week!
I used China Glaze Electric Beat, Dance Baby, Something Sweet, Orly Fresh, Essie Navigate Her. The black was then done with a Sinful Colors black nail art striper polish.


More aboutBeautopia Nails Floral Copy Cat

Floral Water Decals

This design ended up reminding me of old china patterns like my grandmother had. I just painted my nails with Lime Crime Milky Ways and applied the water decals to cover my entire nail. The decals are from Viva La Nails, I got them about 2 years ago when I first got into nail art. They are no longer available but there are many similar designs available, here. The decals are just 2 or 3 flowers per cluster, so I just placed 2 different decals per nail to get full coverage. That's also why they're kind of chopped up in places.


More aboutFloral Water Decals

Floral Skittles

I wanted to do another floral design, but this time I mixed it up with a skittle variation. 
 
I used a lot of different polishes:
Sally Hansen Complete Salon Manicure Cafe Au Lait
Lime Crime Milky Ways
Orly Gumdrop
Rimmel I Lilac You
China Glaze Spontaneous & Sunday Funday

More aboutFloral Skittles

Vintage Floral


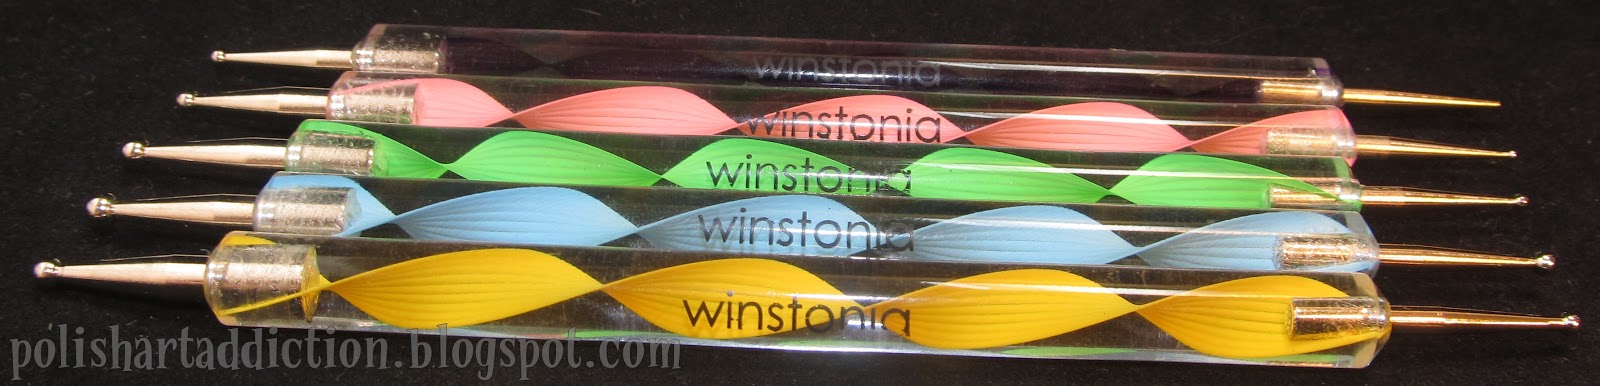
 I was inspired by this design from Aquaayame on Tumblr. Her flowers definitely look more like roses! I'm jealous. This look was created using the 8 piece nail art dotting tool & paintbrush set from Winstonia.
 The nail art set can be found here for $8.95. It's really a great kit for any new nail artist that needs a basic set of tools. Everything comes in the black satin zipper pouch. The kit includes five dual ended dotting tools, a variety of sizes. Also 3 detailing paint brushes of slightly different sizes. The kit also includes "one random color high quality nail file," as you can see, I got the light pink 100-180 grit.
(You can use the coupon code "POLISHARTADDICTION" at checkout to receive 10% off - valid until May 31, 2013)

The paintbrushes are a nice quality and weight to them. The website labels them as "sable detailing brushes" but I was informed by the company that this is not in reference to the actual hairs... but instead just the brown color. I was excited because I had heard that sable brush hairs made for the best paintbrushes.... but I think it's disappointing that they've labeled them in a misleading way.
 Another thing I was excited about was that it said the brush handles were acetone proof! That would be amazing because I'm constantly ruining my brushes by spilling acetone and it eats away at the paint..... One quick dip in my dappen dish of acetone with the back end of the brush....and the paint came right off.! Ugh! I guess they are just referring to the metal ferrule that holds the bristles?

The dotting tools are pretty standard, it's got a nice variety of sizes to cover all of your needs.

This again is the nail look I created all with these paint brushes and dotting tools.

I used a gazillion polishes for this design, I'll just list them.
Base of Zoya Farah. 
Wet N Wild Undercover & Haze of Love 
China Glaze Passion for Petals
Barielle Coco Bar & Lemondrops
OPI Jade is the New Black
& Sinful Colors Exotic Green


More aboutVintage Floral

Coral Dried Flowers

Here is another design I came up with using the dried flower set from Born Pretty.
I used Eyeko Coral Polish & Lime Crime Milky Ways polishes.


I had a rough time where some edges didn't want to lie flat in the topcoat. :( They started to lift and didn't last longer than 24 hours. I was washing dishes and realized they were already half off. Too bad! It was nice while it lasted.

More aboutCoral Dried Flowers

Pressed Flowers

Today I have some dried flowers from Born Pretty that can be incorporated into nail art. Take a look at what I managed to come up with.

I painted my nails with 2 coats of Essie Sand Tropez. Then I applied topcoat. While the topcoat was still wet I used tweezers to pick up the flower and lightly place it on my nail. Then I used the slanted end of the tweezers to gently poke down all of the places that were sticking up. If my topcoat dried too fast, I just dabbed a little more under the flower where I needed it. Once the flower was stuck down good, I applied 2 thick coats of Seche Vite to really lock it in.


I found these pretty easy to work with. I think they would look even better under clear gel polish. I think that would make them look even more like pressed under glass...

These can be found here at Born Pretty for $6.08. It comes as a pack of 12 which is really a good deal in my opinion. The only problem is that each cannister only hold a few flowers. So you need to plan your design around that. There were only 3 of these teal bundle flowers available.... Some of the smaller single flowers had only 2 or 3 in the cannister. So 10 finger nails and only 3 flowers might make for a random combination. But feel free to mix it up and use multiple colors. 

Don't forget about my 10% off coupon code if you decide to purchase these for yourself.

More aboutPressed Flowers

31 Day Challenge - Day 14 - Flowers

Did you guess this one right? Flowers! How could I not do "Flower" from Bambi!? It was a perfect match.
You can also check out this other Bambi design I did a while back.


I started by painting all of my nails with Sinful Colors Black on Black. The middle nail is painted with SPAritual Eye of the Beholder with black acrylic paint already started for Flower's outline.

Then white acrylic paint. You can see I just splotched on the flower shapes on the non-"Flower" nail.

The rest I think is pretty self explanatory....


2 thick coats of Seche Vite to even everything out!

"Delicate" is next! Whatever shall I do? You'll have to wait and see! It's a good one!
More about31 Day Challenge - Day 14 - Flowers